API > Core Products API > Multiswap
Multiswap Best Practices
What are good input images?
The quality of your result depends heavily on the quality of your input photo. Below are examples and tips to get the best results possible.
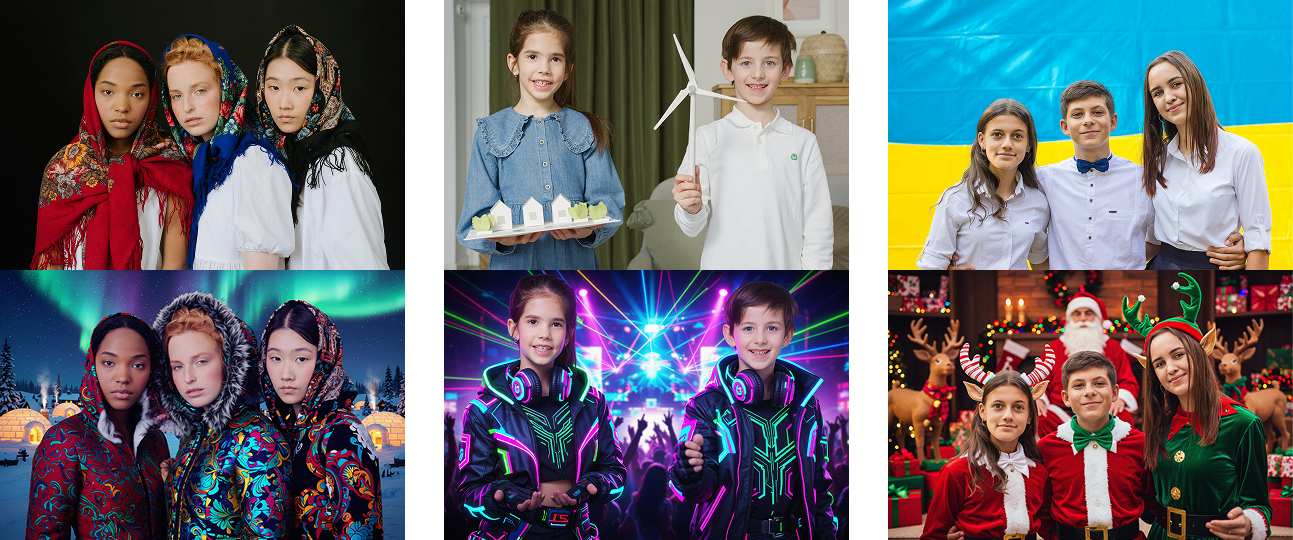
✅ DOs — What Works Best
- Use well-lit photos (natural light is ideal)
- Keep the head facing forward or slightly angled
- Choose high-resolution images (clear, sharp details)
- Ensure the face is fully visible (no sunglasses, hands, or obstructions) and makes up around 1/3 to 1/2 of the image, the more details are visible the better
- Close-up and upper-body medium shots ensure that the identities of all visible faces are well preserved
- Keep amount of people in the input images within 1–5 people for the best results
- 📸 See examples of good input photos to understand how to set it up
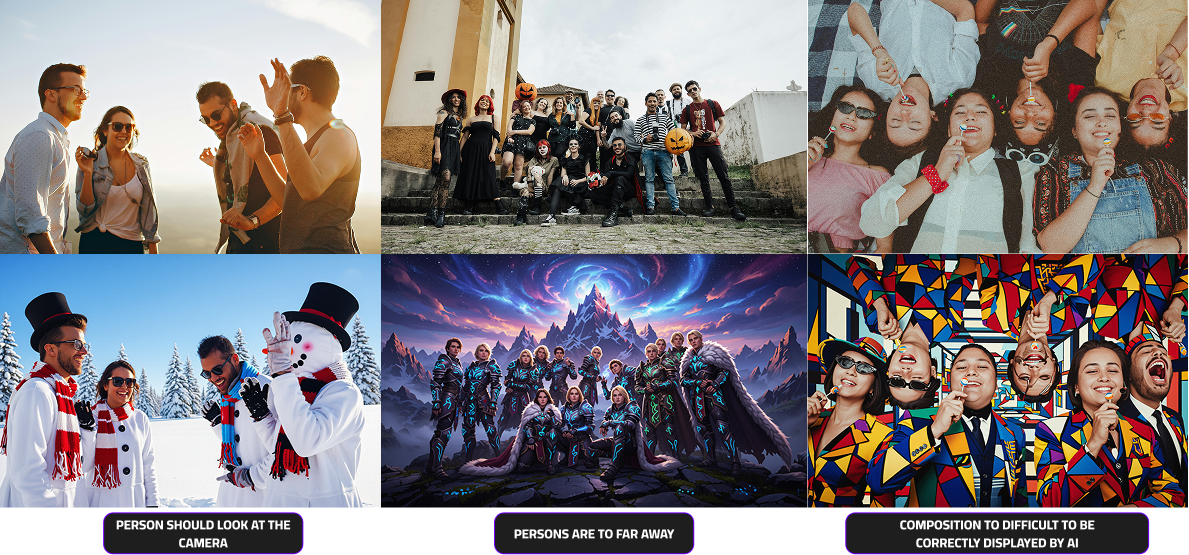
❌ DON’Ts — Common Mistakes
- Avoid blurry, pixelated, or low-resolution selfies
- Don’t use side profiles or extreme angles
- Skip photos with harsh lighting or strong shadows
- Avoid hats, filters, or obstructions covering the face
- Extreme wide-shot images where face details of the subjects can be lost
- 📸 See examples of bad input photos to understand what to avoid
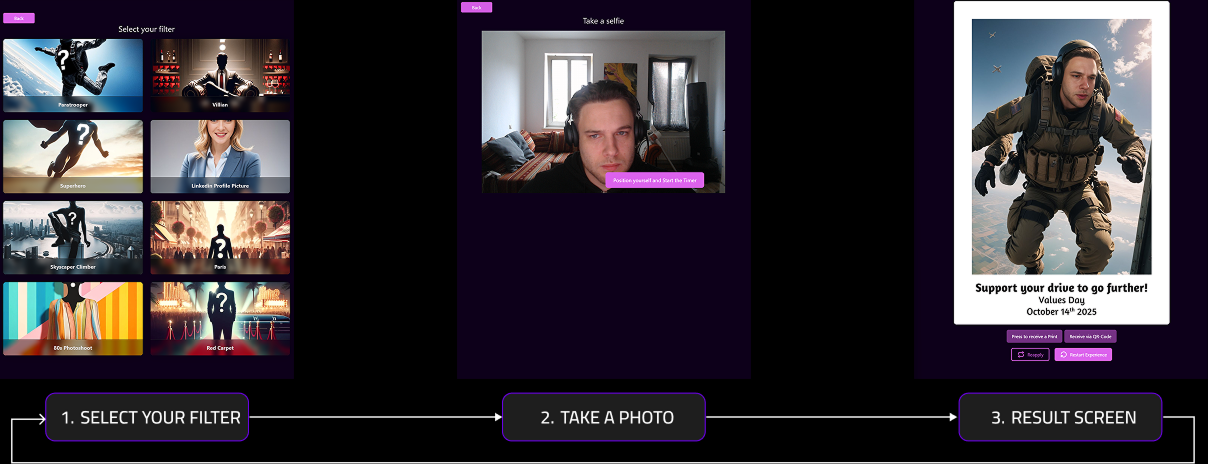
How should i create a good user journey
To integrate the MultiSwap experience seamlessly into your web app or photo booth setup, follow the recommended user flow below:
- Filter Selection – Let users choose from the available styles or effects (Realistic or Stylized).
- Photo Capture – Start a short countdown before taking the group photo, giving participants time to pose and prepare.
- Processing & Results – While the image is processing, display a loading screen.
- Result Screen – Allow users to download, share, or print their generated image. Offer clear options to retake the photo or start again.
This simple, interactive flow ensures a smooth and engaging experience for both single and group sessions.
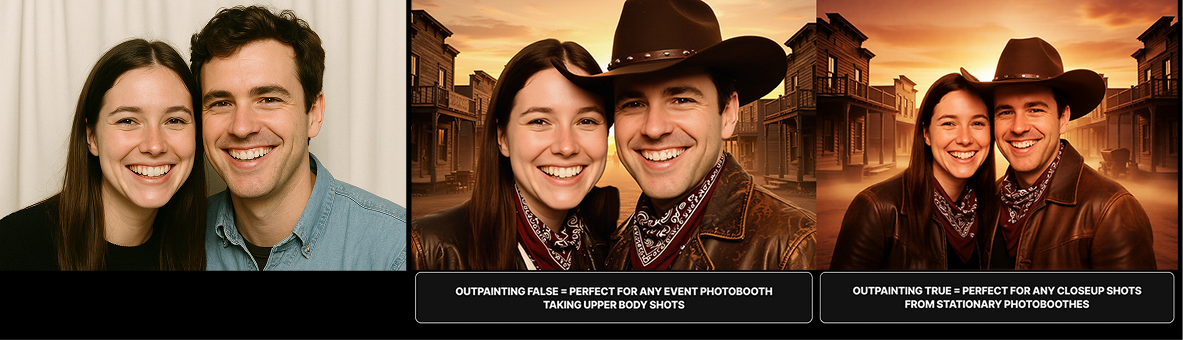
MultiSwap Realistic Outpainting
Outpainting in MultiSwap Realistic is a special feature designed to extend the visible area of extremely close-up group photos. When the original image shows only faces or a very narrow frame, this technology intelligently “zooms out” and imagines the missing context — such as upper bodies, clothing, and surrounding details — to generate a complete and natural-looking scene.
This mode is ideal for stationary photo setups or photo booths that capture participants at very short distances, where only facial regions are visible. It ensures that the final composition appears balanced and realistic, even when the original frame is tight.
However, Outpainting should only be used for true close-up photos. If applied to standard portraits or upper-body shots, the results may look distorted or unnatural. It’s a specialized feature created for specific camera setups and use cases where subjects are photographed very closely together.