How to Create Filter
The Create Filter page is where you create, test, refine, and finalize filters before publishing them.
This page provides an overview about:
- Choose the correct model
- Creating & Testing via Text or Image
- Finalize the Filter
- QA — Test Before Going Live
1. Choose the correct model
Inside the Filter Creator you can work with all our available models.
| Model | Supported Persons | Available Transformation logics | Limitations |
|---|---|---|---|
| FaceSwap v5 | 1 Person | Text Filter Inpainting |
IP-related assets can be enabled via inpainting mode |
| FaceSwap v6 | 1 Person Soon: Multi-Person (for up to 4 persons) |
Text, Inpainting (Img2Filter), Soon: Generative (Text + Assets) |
IP-related assets can be enabled via inpainting mode |
| MultiSwap (Stylized & Realistic) | 1–5 Persons | Text only | IP-related assets cannot be used (e.g. integration of a character, a object or similar) |
Understanding the Transformation Logics
To fully leverage the Filter Creator, it is essential to understand the three filter logic types.
| Category | 🟢 Text Filter | 🟢 Inpainting Filter | 🟢 Generative Creation (Text + Assets) |
|---|---|---|---|
| Definition | Filter is created purely via a structured text prompt. | A predefined concept is activated via masking + text logic. | Fully generative filter combining structured assets with text-driven scene composition. |
| How It Works |
|
|
|
| Level of Control | Low | Very High | Very High |
| What Stays Stable | no elements are consistent | everything not masked | Uploaded Assets, |
| What Changes | Clothing, environment, style, lighting | Masked areas only (e.g. outfit, body) | Full scene composition with preserved assets |
| Ensures | Fast execution & creative flexibility | Partial, precise transformation Stable composition High photorealistic consistency | Maximum creative flexibility Asset consistency without detail loss Complex scene composition |
| Best For | Fun Purposes, enables to create unspecific scenes in a fully generative way | Any kind of serious activation requiring consistent details for specific assets
|
|
| Model Availability | V5, V6, MultiSwap | V5, V6 | V6 (extended asset support coming soon) |
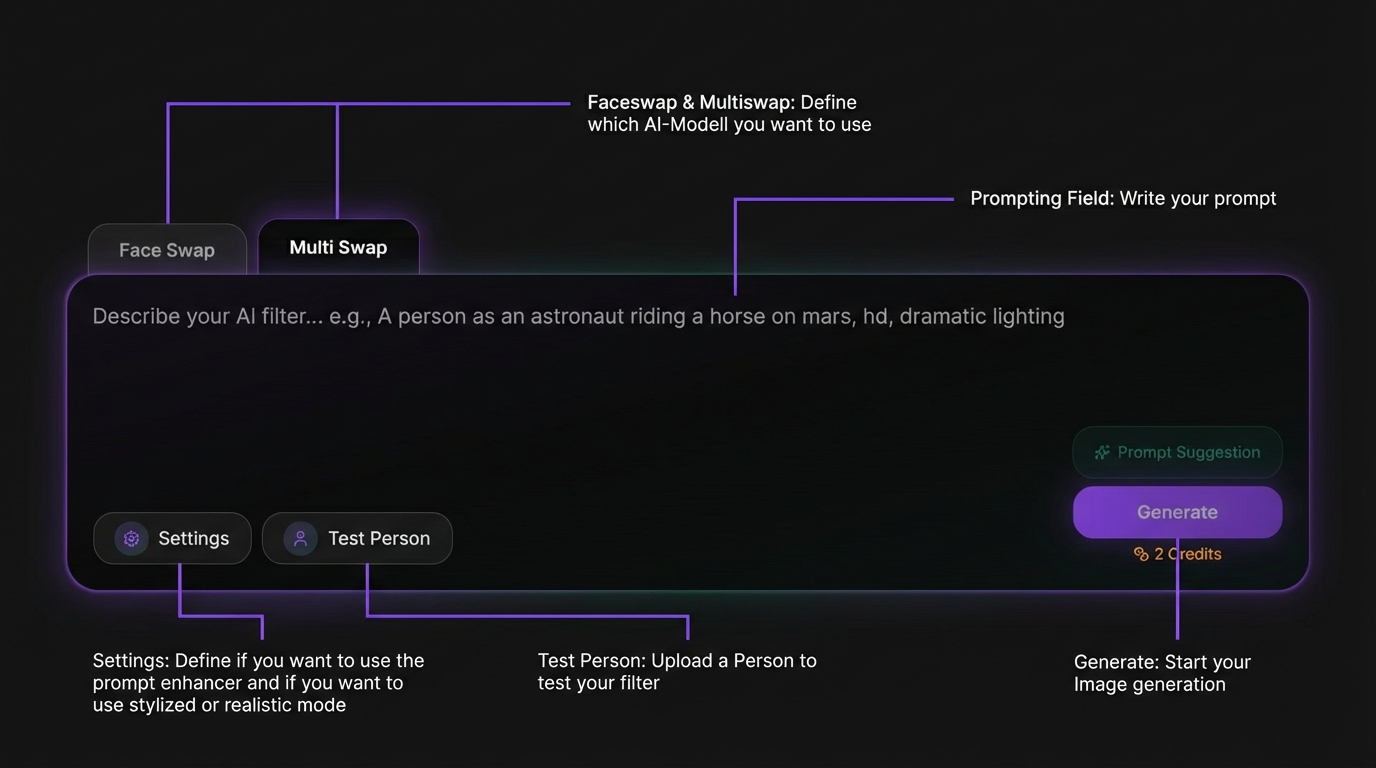
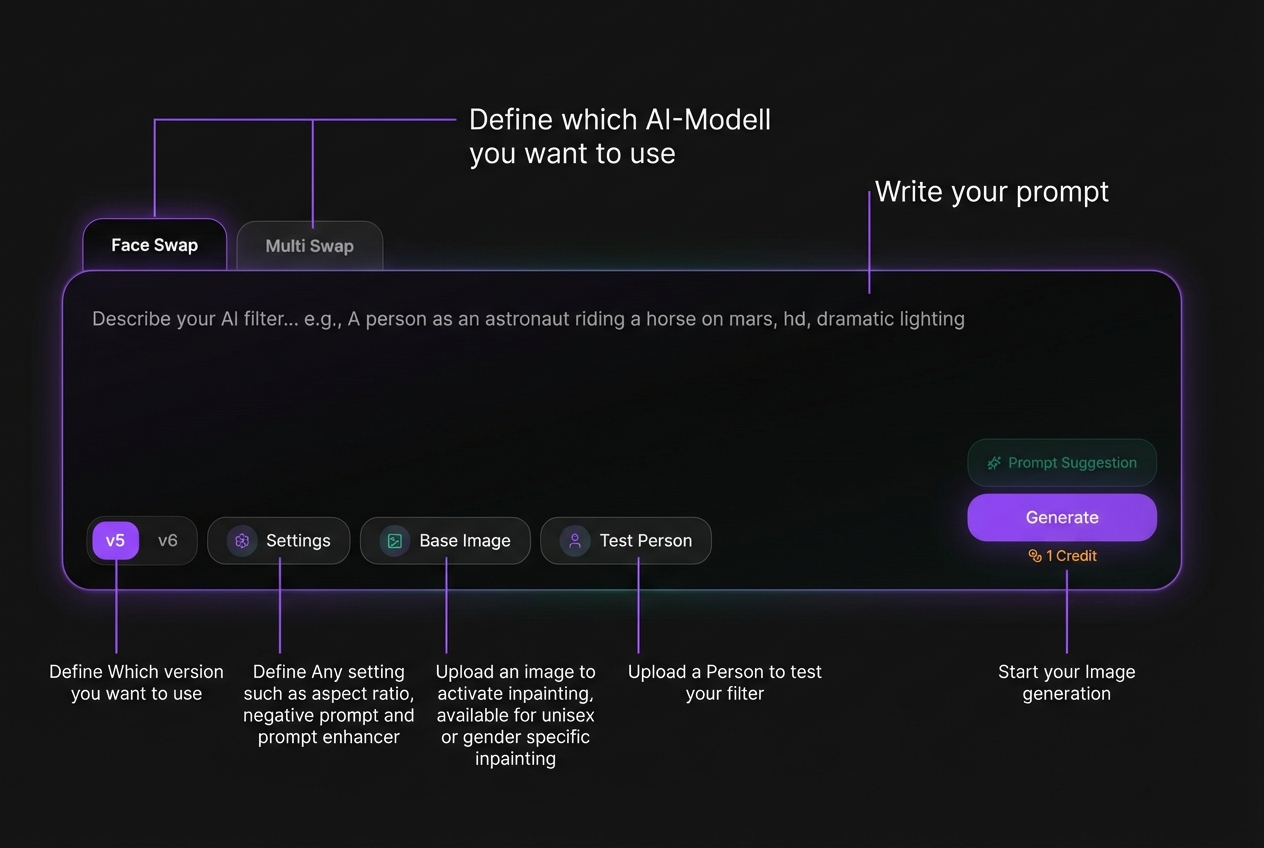
2a. Creating & Testing via Text only (Text 2 Filter)
Creating with our Faceswap Models are possible in two ways:
A. Text 2 Filter (via Prompting) - (supports both Faceswap or Multiswap)
Write your prompt describing the final output.
- Wire a prompt or use the Prompt Suggestion to auto-generate and refine your prompt.
- Upload a test person to preview results
- Adjust settings (aspect ratio, prompt settings, etc.)
- Generate and iterate until satisfied
Learn how Text2Filter works: Faceswap: Text2Filter
Learn how multiswap Text2Filter works: Multiswap: Text2Filter
 |
 |
B. Using Base Images (Image2Filter) - supports only Faceswap
To start the mode, upload a base image. This is only available for our Faceswap models
- The aspect ratio is automatically taken from the image
- You can define gender variants (Unisex, Male/Female, etc.)
- Upload base images for each selected category
Learn how Img2Filter works: Faceswap: IMG2Filter

3. Review Generated Results
After generating, you can:
- View the exact prompt used
- Copy the image to the Conceptualizer for variations
- Download the image
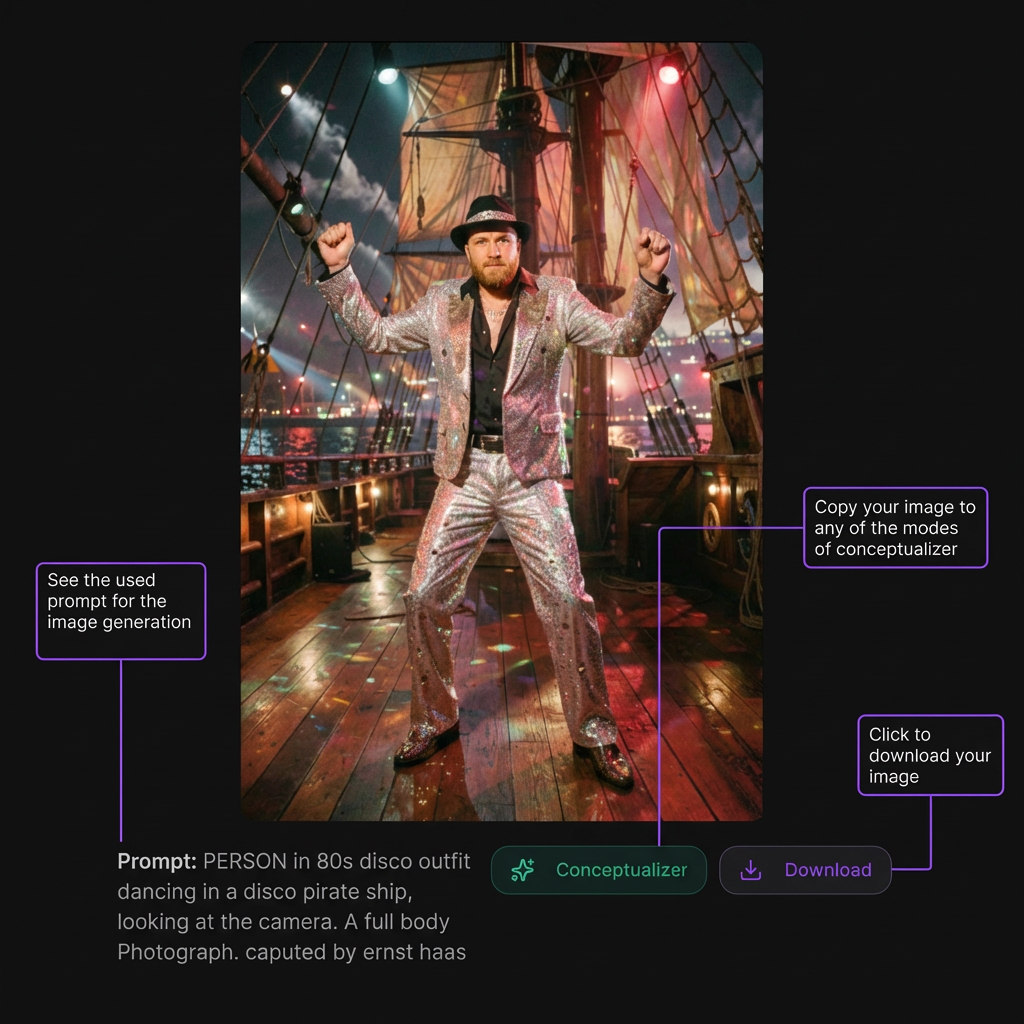
Once you’re satisfied, proceed to finalize the filter.
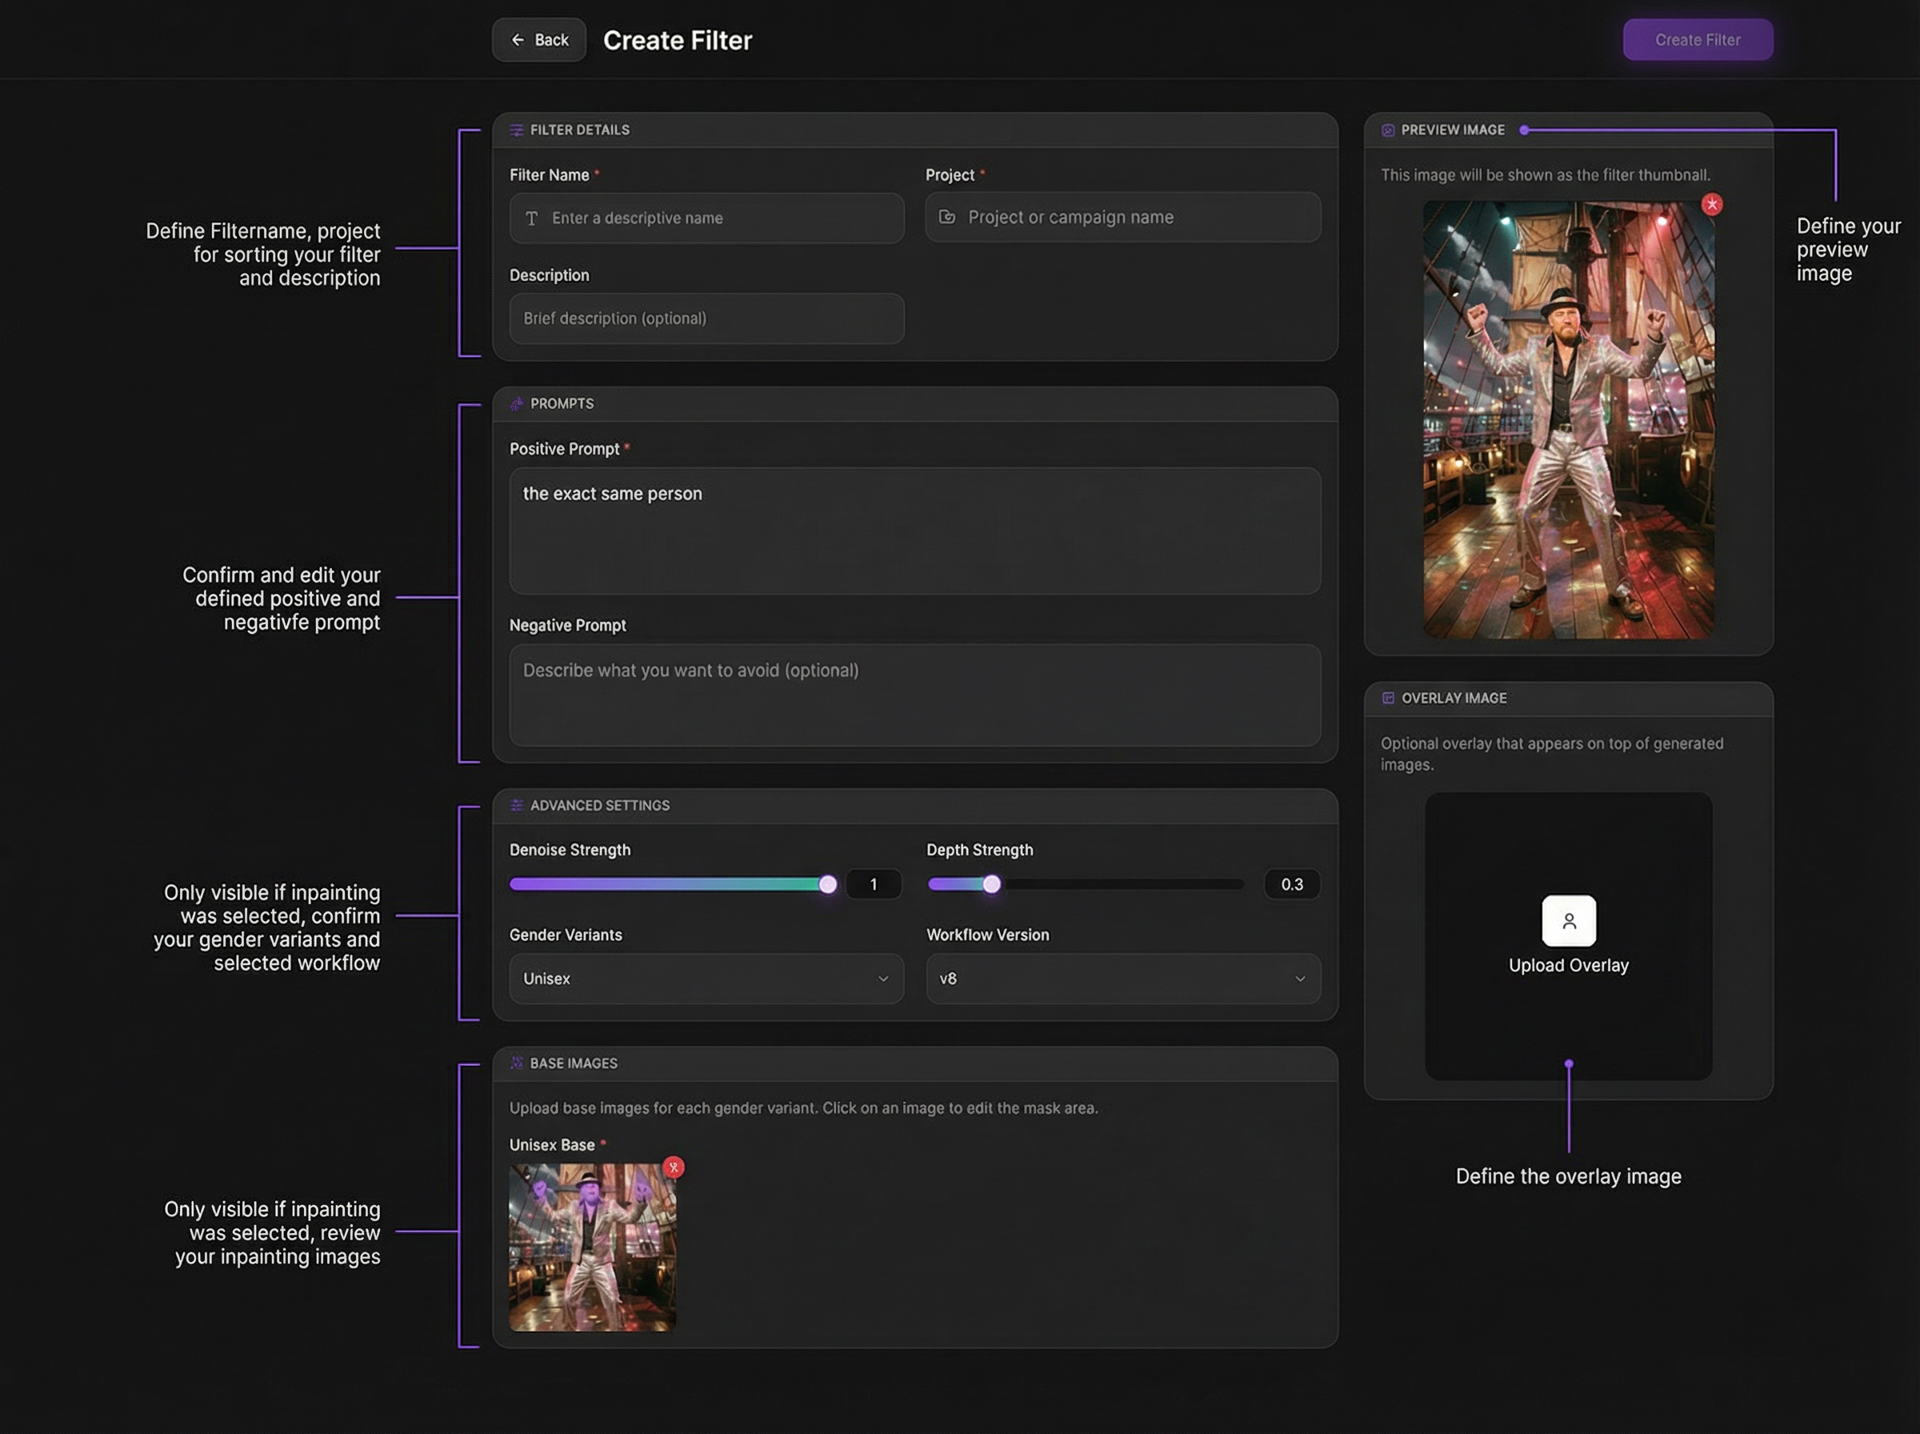
4. Finalize the Filterinformation
When confirming a filter, you can:
- Set filter name and project
- Confirm/edit prompts
- Adjust advanced settings (if used)
- Define preview image (filter thumbnail)
- Upload optional overlay image
Preview image and filter name will appear in the photo booth and via API. Click Create Filter to save.
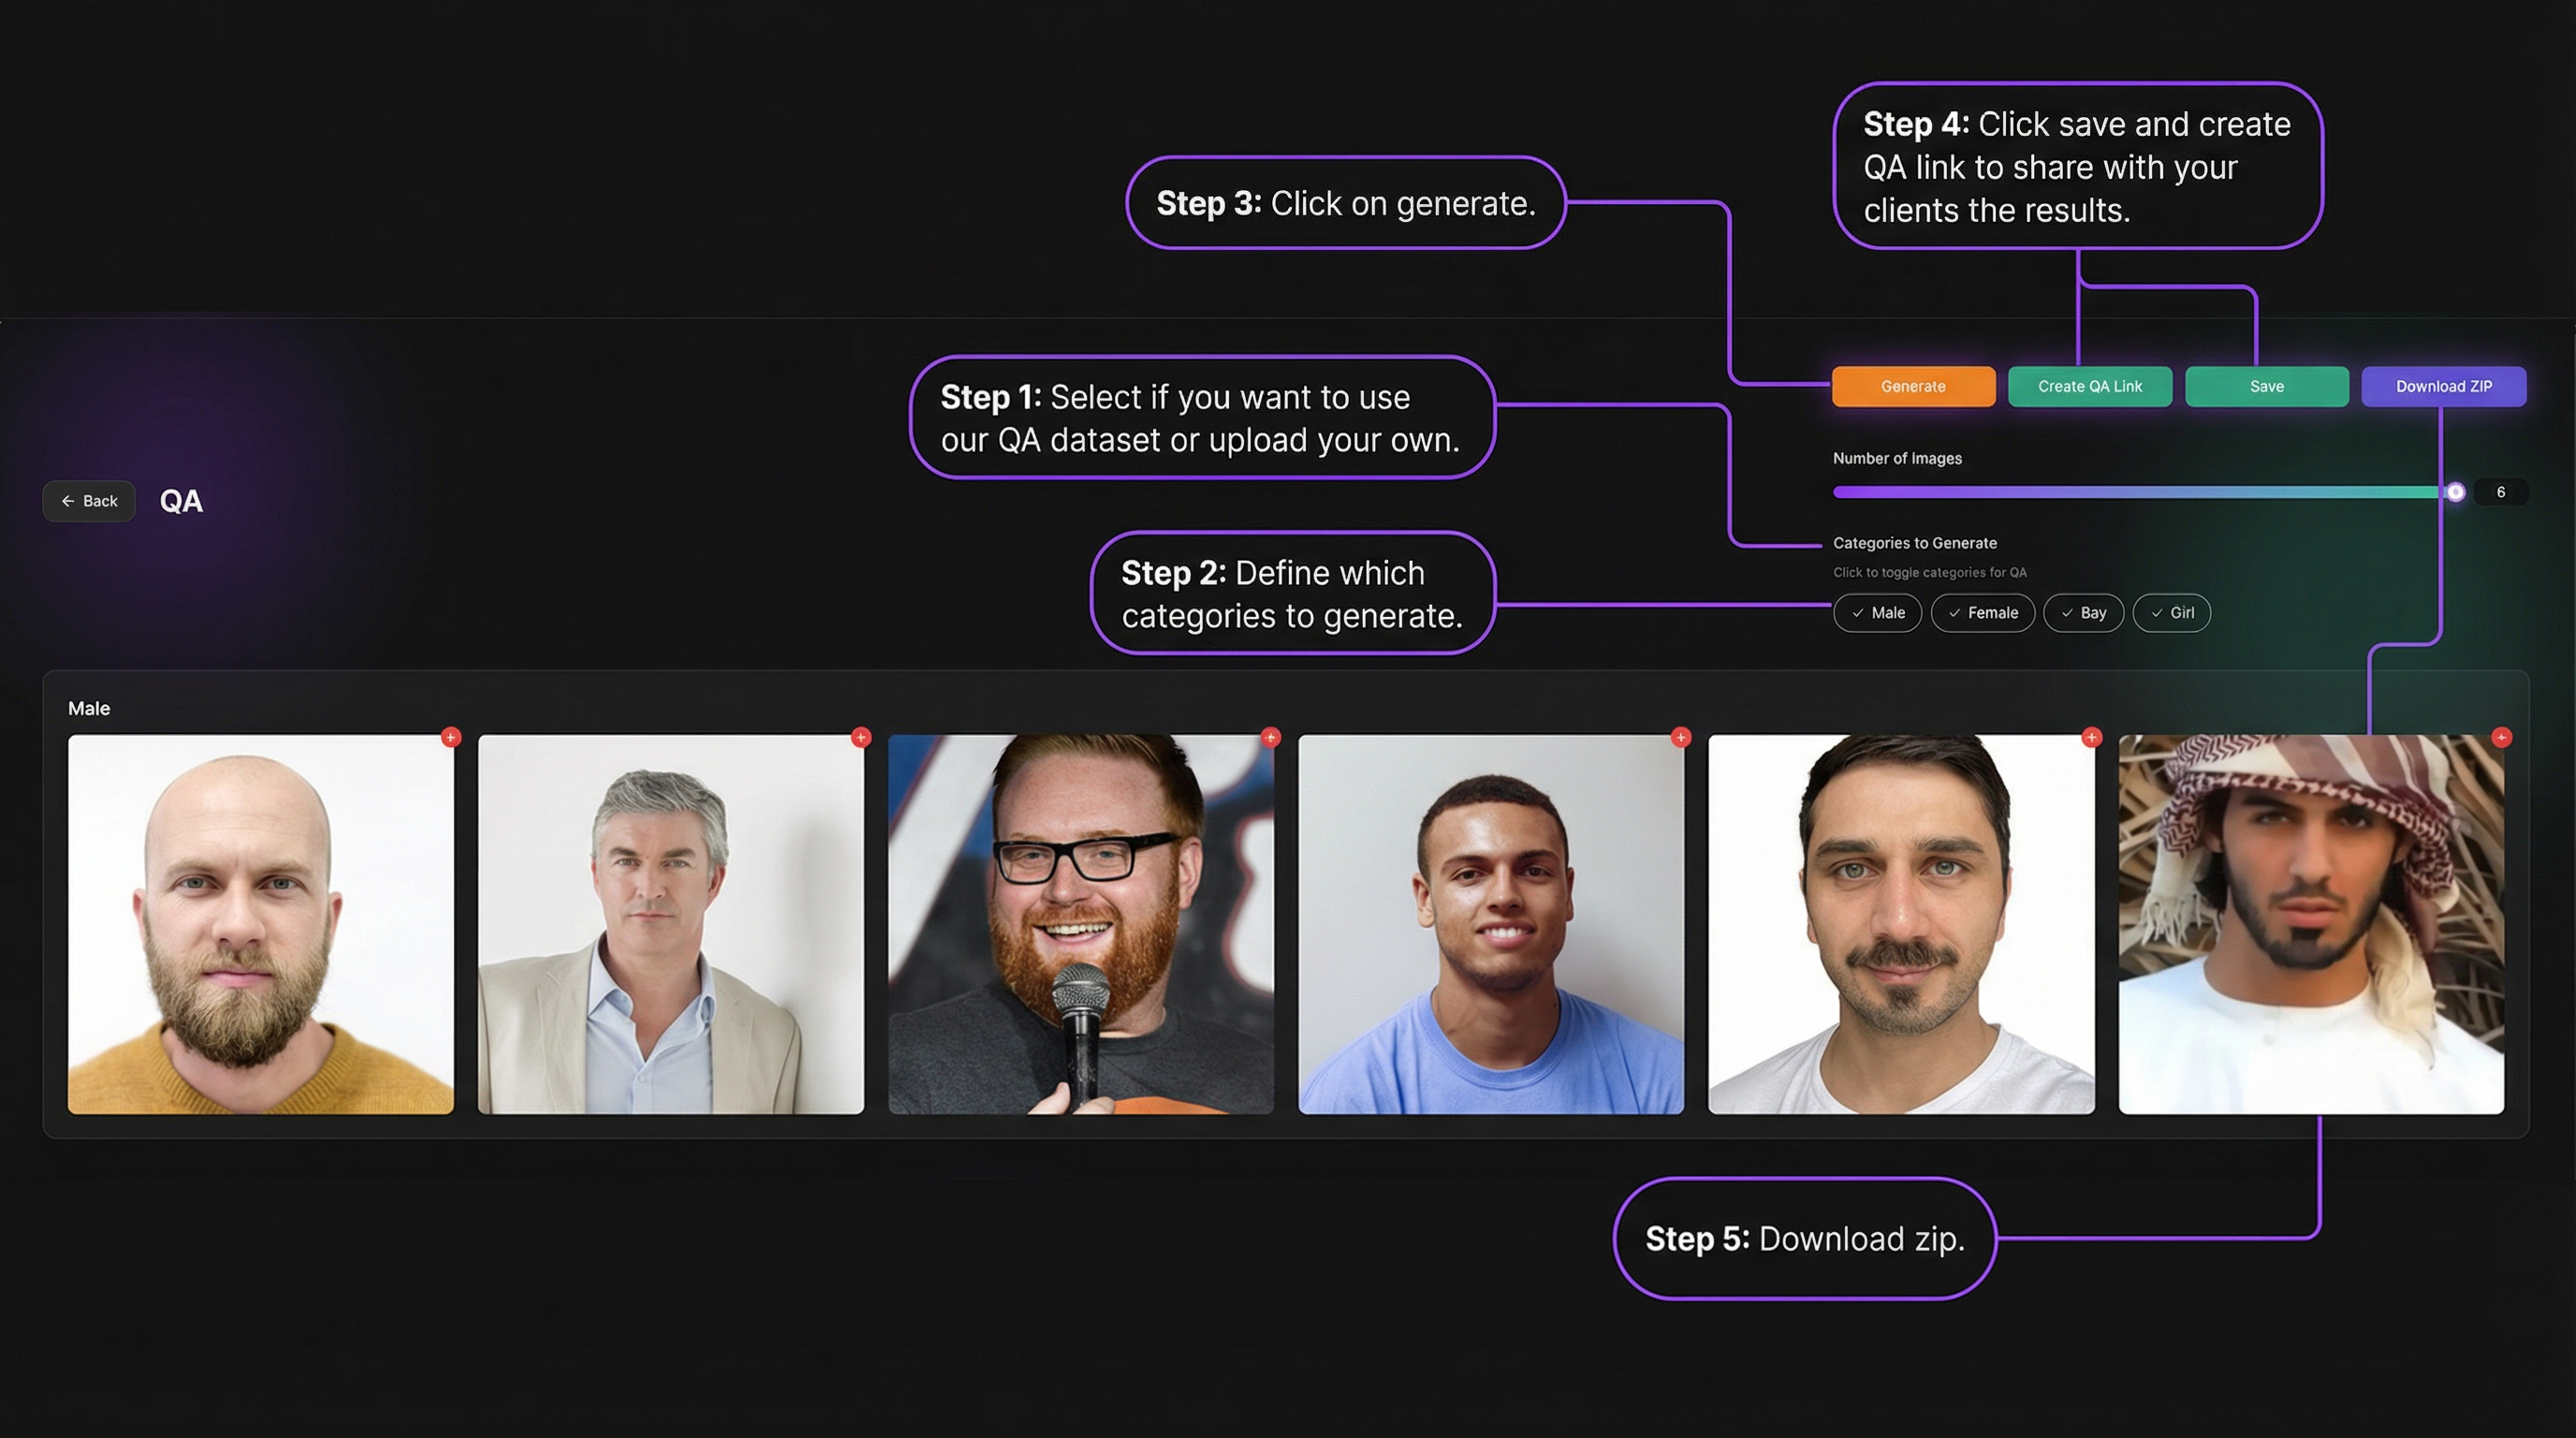
5. QA — Test Before Going Live
After saving, run QA to validate your filter.
You can:
- Use preset test datasets or upload your own
- Select categories to generate
- Generate results
- Save results or create a shareable QA link
- Download all outputs as ZIP
QA helps ensure consistent results across faces and scenarios before deployment.
Learn how to setup a good QA dataset: How to create a good QA Dataset?