How to Manage Filters
1. Filters — Manage & Test Filters
The Filters tab is where you manage all created filters.
In this page you learn:
- Filter Actions
- Editing Filters
- QA — Test Filters Before Going Live
- Quick Test
- Aliases — Stable Filter IDs
- Create Alias
- Edit or Reassign Alias
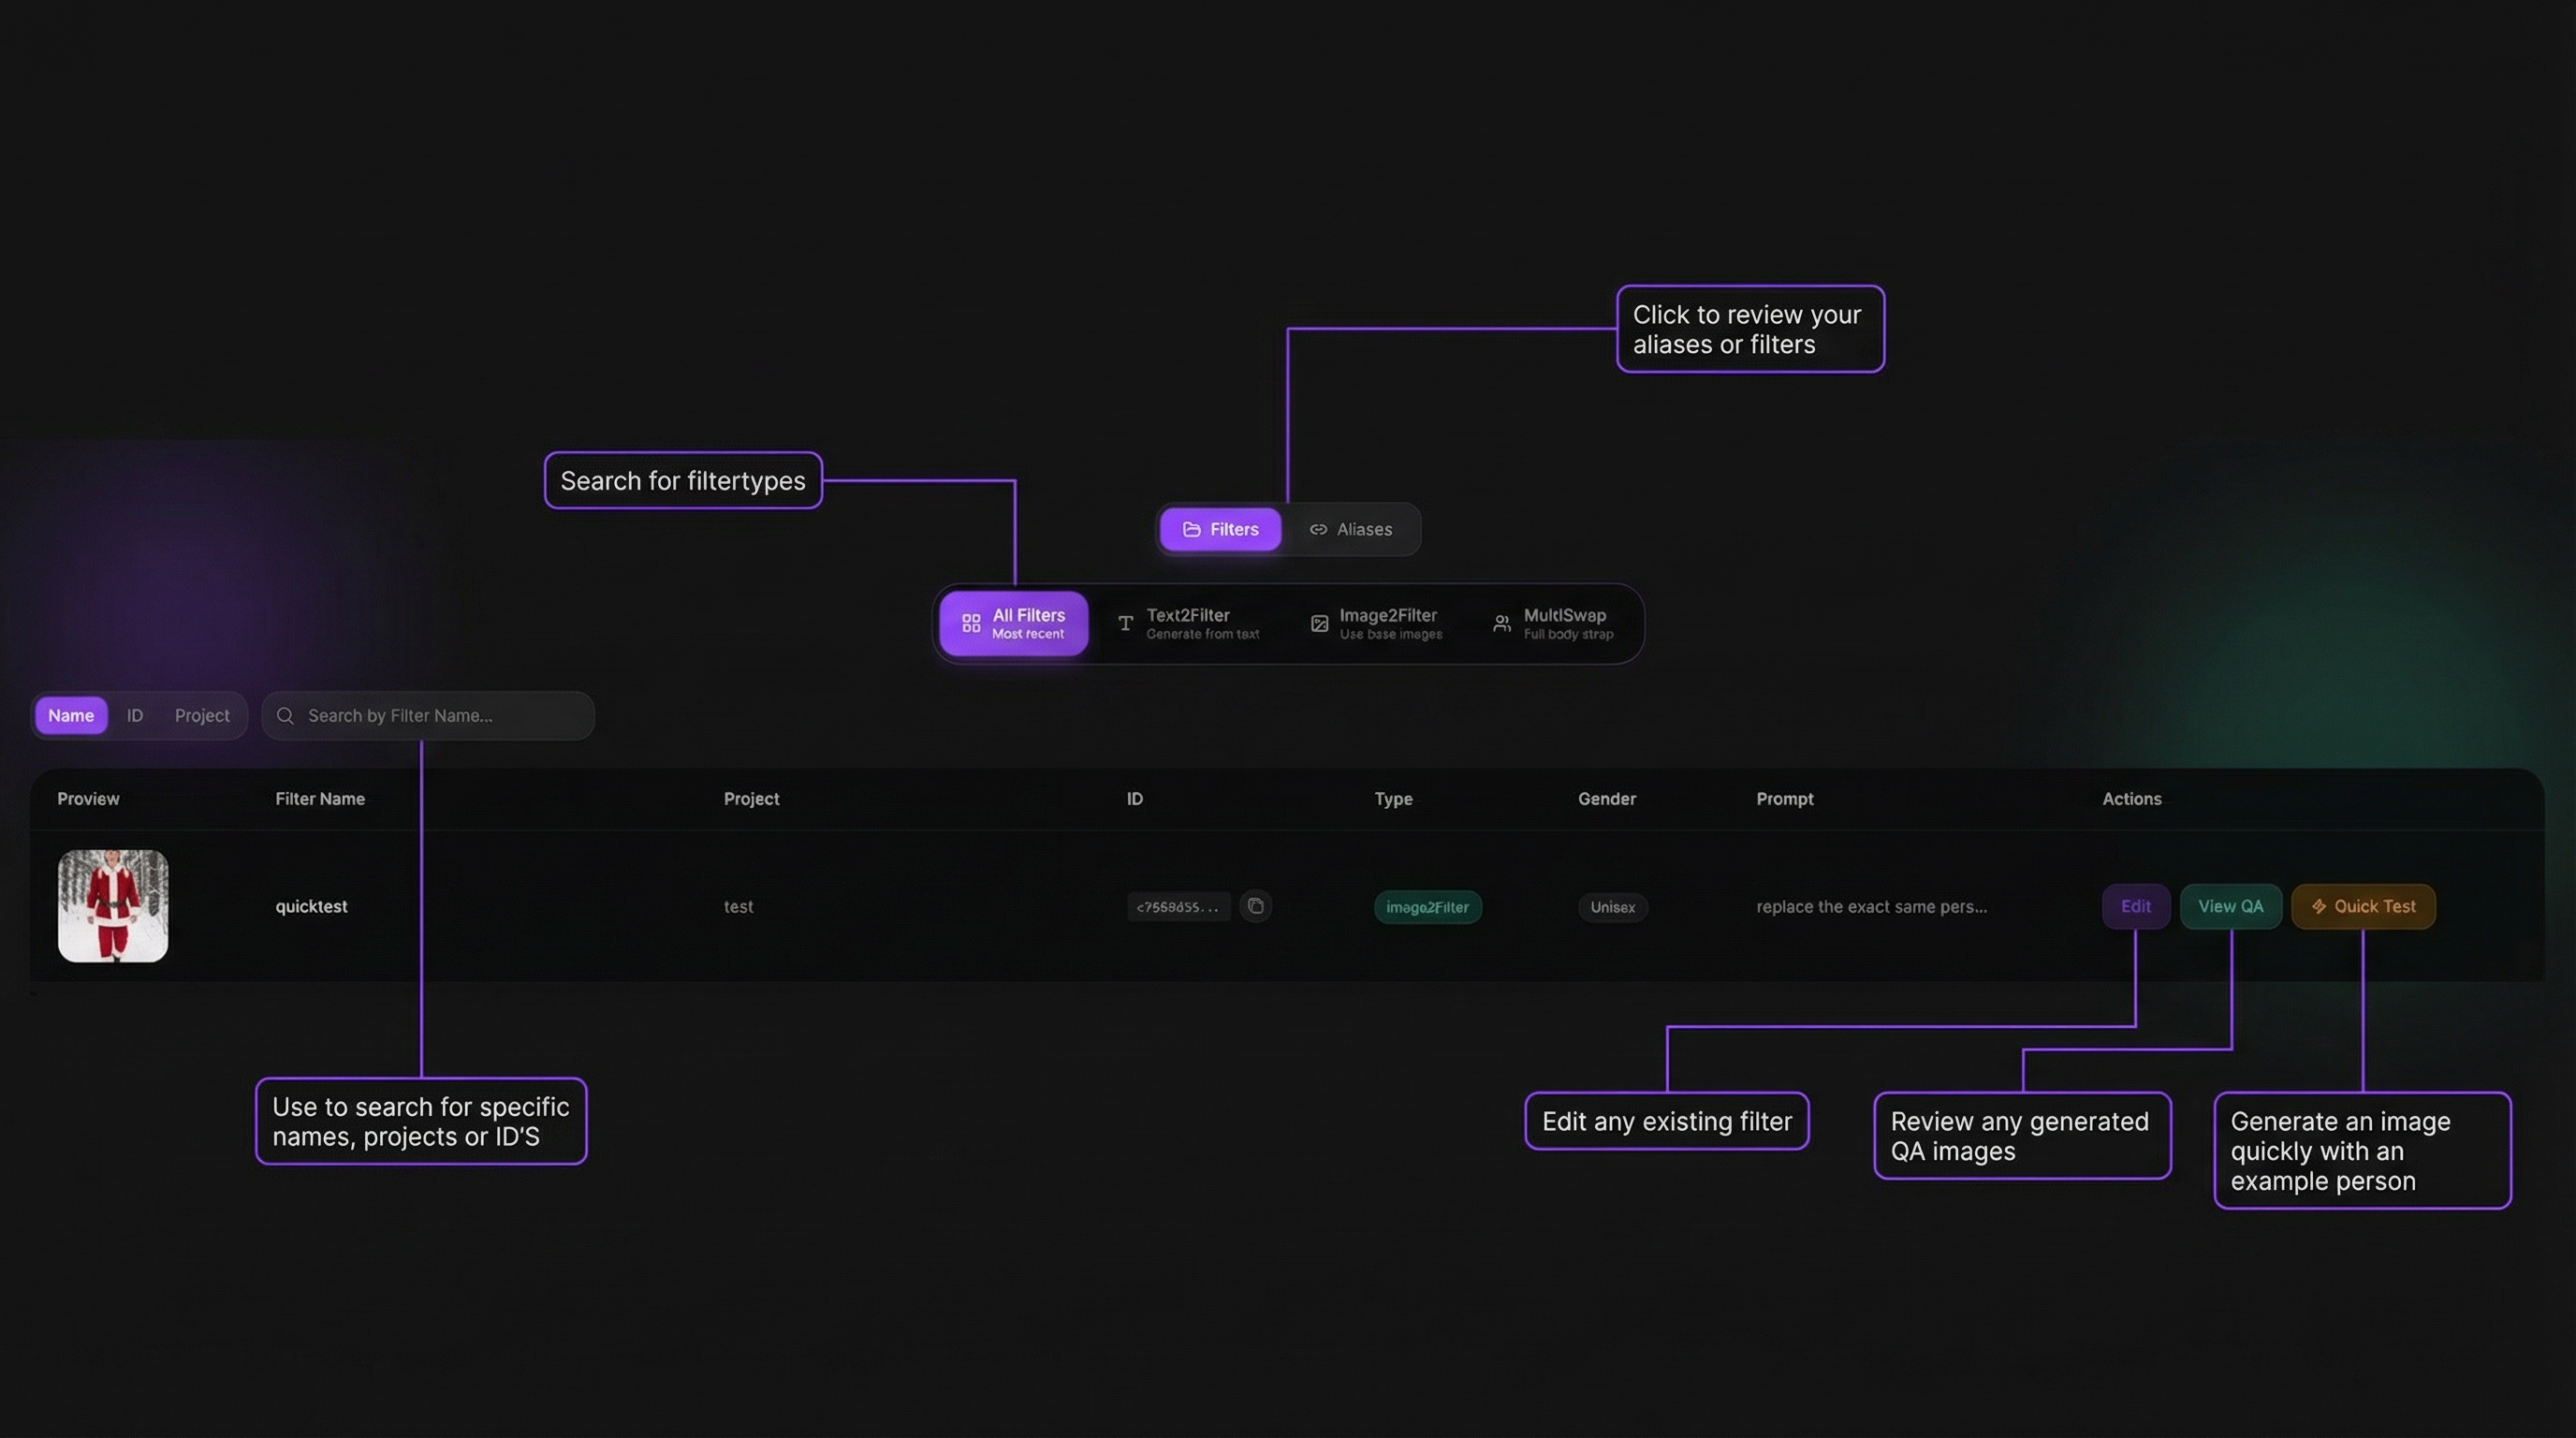
Filter Actions
Each filter includes three main actions besides it´s general information:
| Action | Description |
|---|---|
| Edit | Edit filter information (preview image, filtername etc.), filter settings, prompts or images |
| View QA | Open QA testing page |
| Quick Test | Test instantly without leaving page |
2. Editing Filters
To edit an existing filter:
- Find it in the Filters tab
- Click Edit
- The filter opens in the editor with all settings preloaded
- Adjust QA, prompts, images, or settings
- Click Update Filter
Once you confirmed the new settings your filter will be updated instantly
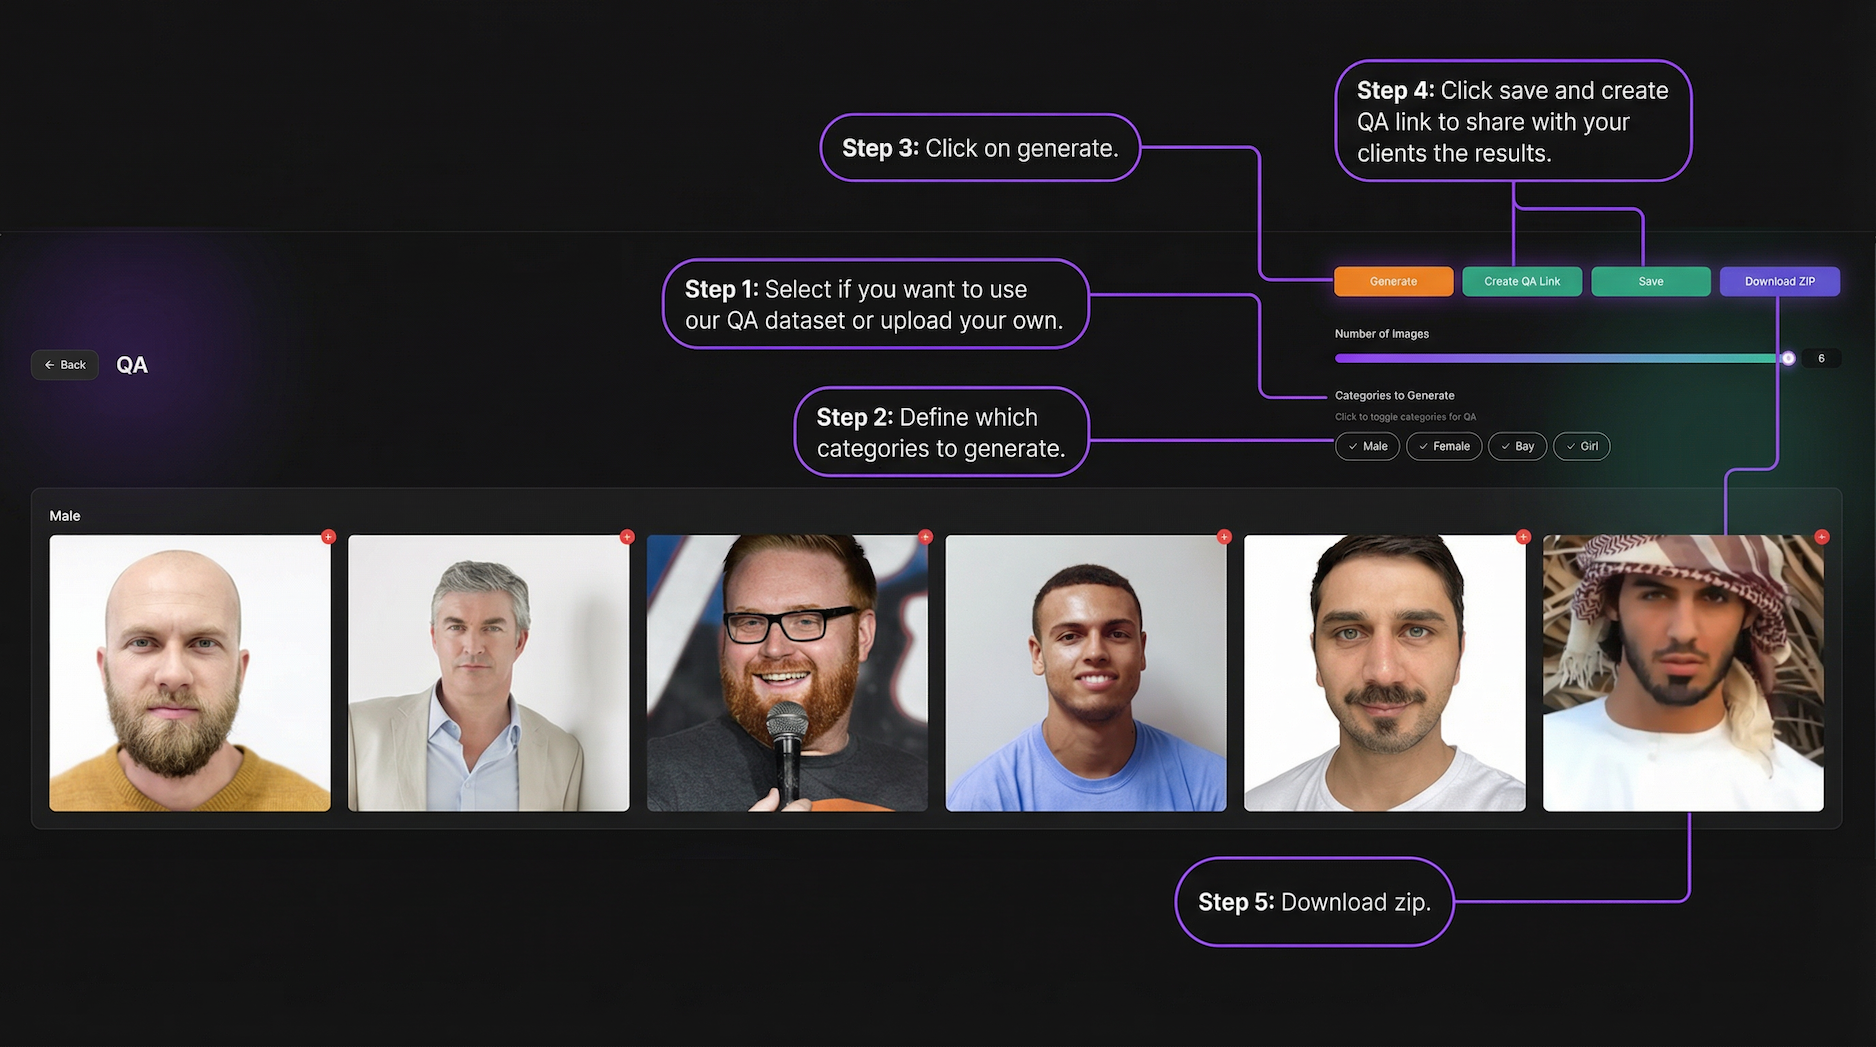
3a. QA — Test Filters Before Going Live
Use QA to validate filters across multiple photos. Access QA via View QA on any filter row.
3b: Quick Test — Use created Filters for single Photos
The quick test enables you to create, in a quick manner, AI-generated images based on existing filters. This tool helps you to create quickly images based on uploaded photos to showcase created images to persons outside of your organization, for example, for ongoing sales talks and/or reporters or the media generally or other stakeholders. These stakeholders may not need the whole QA test set but only a created personalized image.
- Look in the Table for the filter you want to test
- click on the far right side on “Quick Test”
- Upload the Photo
- Select the Gender accordingly with the gender of the person in the uploaded photo
- Download the result
- The process is finished or can be repeated
4. Aliases — Stable Filter IDs
1. What is an Alias?
An Alias is a stable UUID that points to one of your AI Filters. Think of it as a "remote control" for what filter is active in a specific slot of your application.
Example: Your photo booth has a "Holiday Theme" slot hardcoded as alias x9y8z7w6-.... In December, you point it to a Christmas filter. In February, you swap it to a Valentine's filter. The photo booth code never changes — you just update the alias in the Filter Creator.
2. When to use Aliases
- Your development team has integrated filters into a product (photo booth, app, kiosk, website)
- You want to change which filter is used without asking a developer
- You run seasonal campaigns or events where filter content rotates
- You want a clean audit trail of which filter was active when
3. Workflow with your development team
Here is the typical workflow between designers and developers:
- You (designer) create a filter in the Filter Creator.
- You create an Alias and assign the filter to it.
- You copy the Alias ID and share it with your development team (via Slack, email, project management tool, etc.).
- Developer hardcodes the Alias ID in the application once.
- You can now swap the filter behind that alias anytime — the application picks up the change automatically.
For the developer's side of the integration, see How to use Alias IDs in your integration.
4. Tips
- Use descriptive project names. "Photo Booth Slot 1" is better than leaving it blank. It helps your team find the right alias quickly.
- One alias per slot. Create a separate alias for each place in your product where a filter is used. This gives you independent control over each slot.
- Check "Last Used". If an alias hasn't been used recently, the integration might not be active or the code might not be deployed yet. Coordinate with your developers.
- Don't delete active aliases. Always check with your development team before removing an alias — it will break the integration immediately.
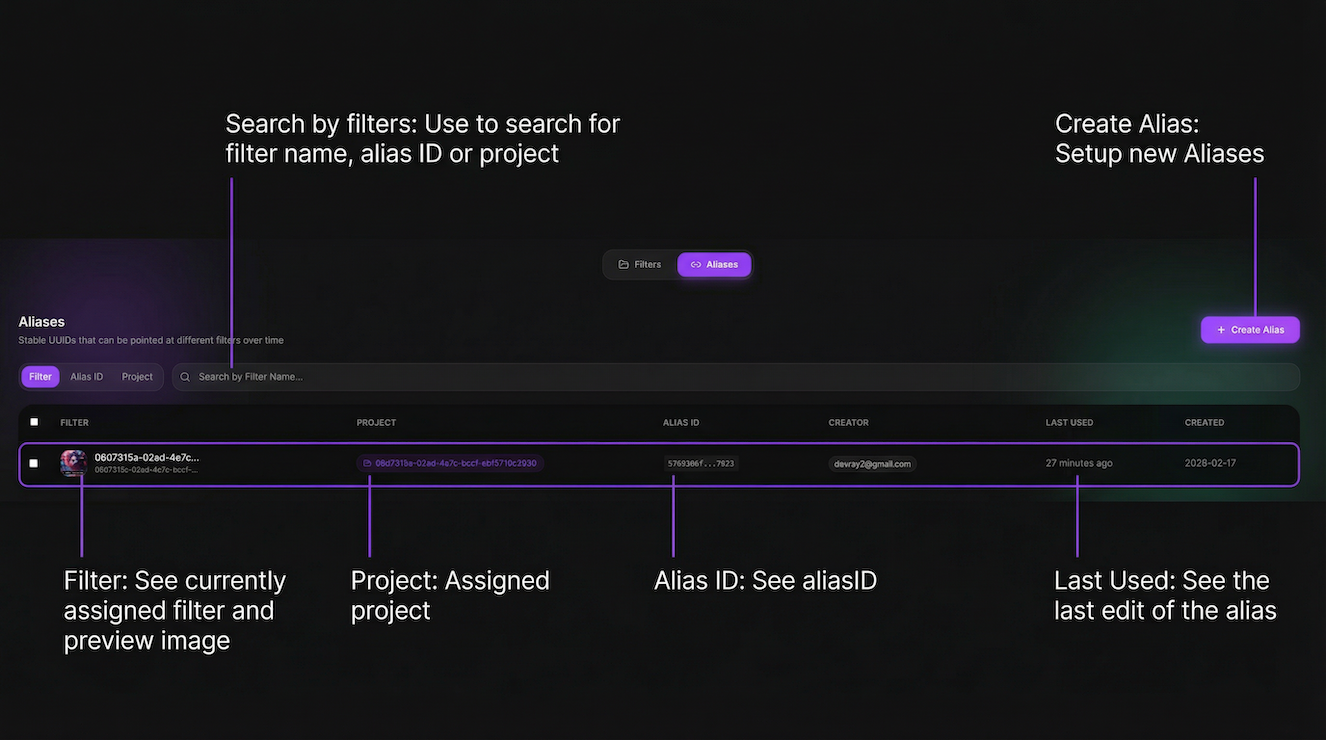
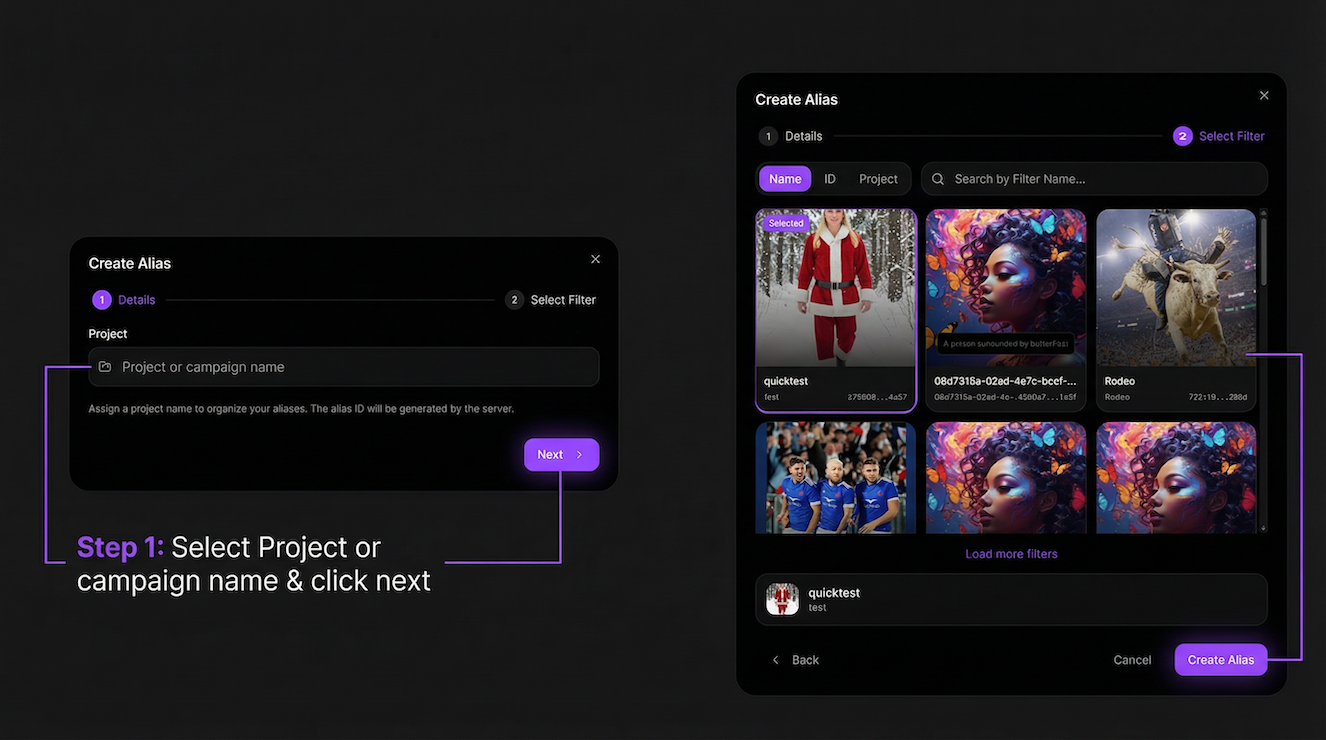
Create Alias
Click Create Alias and select a filter.
The alias can now be used instead of the filter ID.
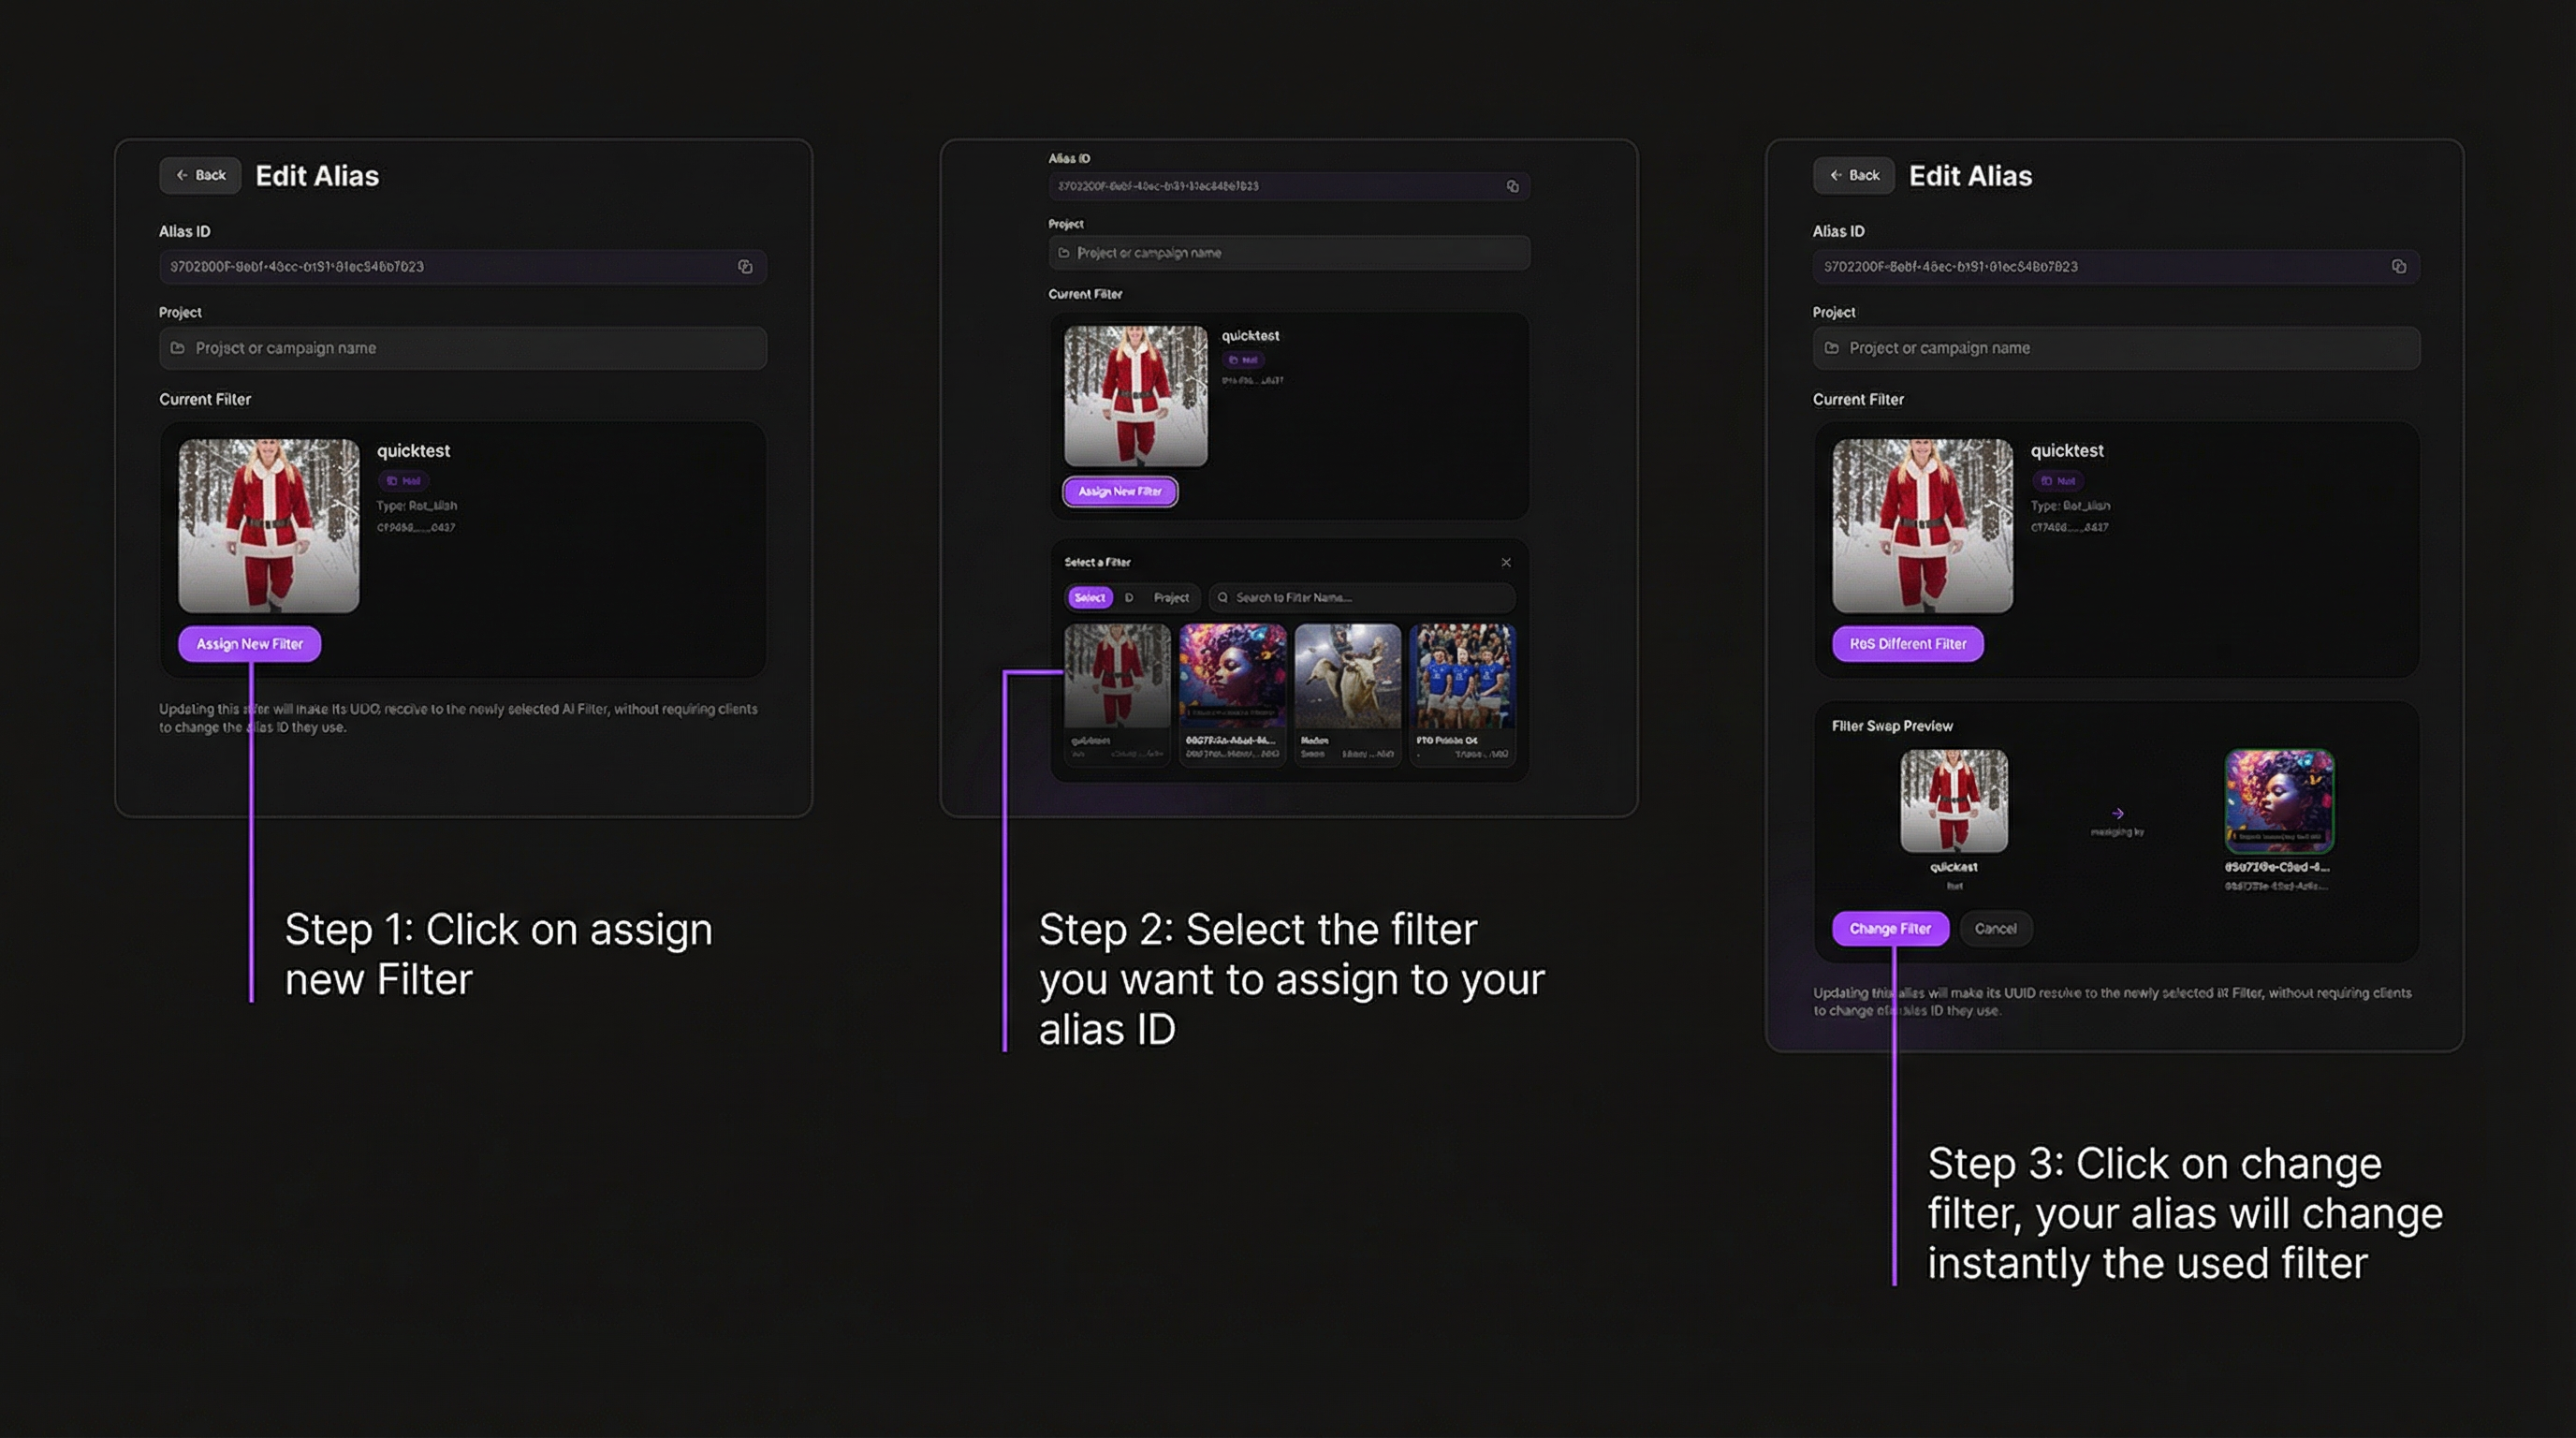
Edit or Reassign Alias
Click any alias row to edit.
You can:
- View alias ID
- Change project
- Assign a new filter
- See previous filter history
Place image below:
(edit-alias.png)
Reassign Filter
- Click Assign New Filter
- Select replacement filter
- Confirm swap
Important:
Always replace with the same filter type (FaceSwap FIlter with other FaceSwap Filters).
Limitations of current alias IDs:
- Faceswap AliasIDs can only be used for Faceswap filters
Multiswap AliasIDs can only be used for Multiswap filters