WebApp Help Center > Filter Creator
How to use the Filter Creator
Filter Creator
The AI Filter Creator gives you full creative control to design your own filters using any of our AI models — directly inside the EventStudio WebApp.
Whether you're building a theme for a corporate event, birthday, festival, or fantasy activation, this tool allows you to create, test, and save reusable filters in just a few steps.
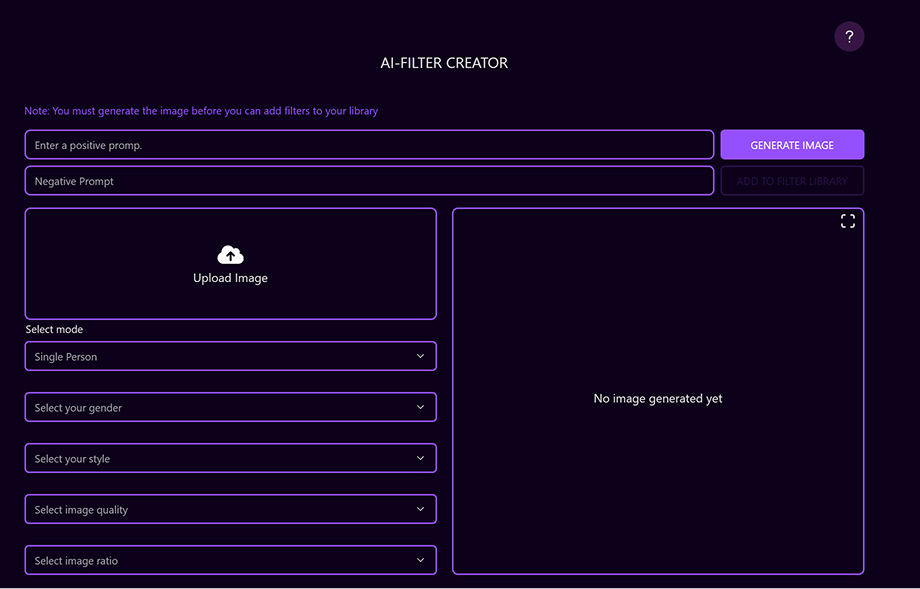
Step-by-Step Guide: How to Create Your Own AI Filter
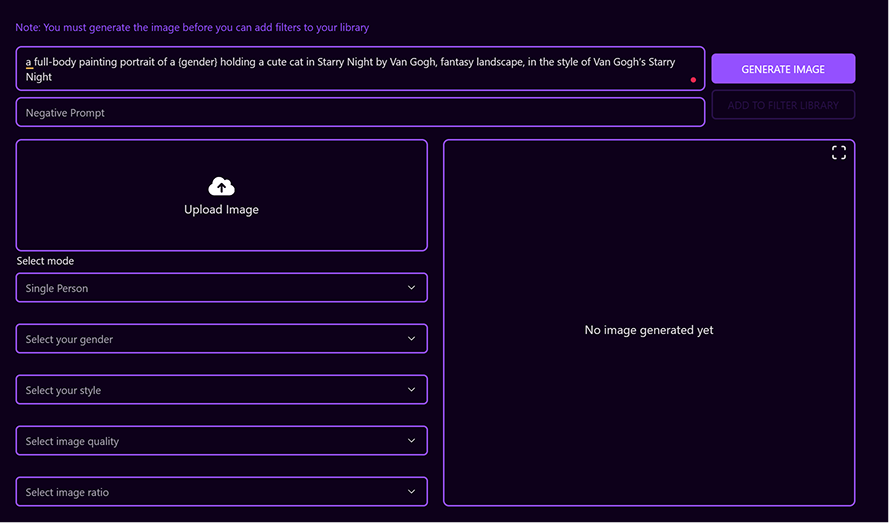
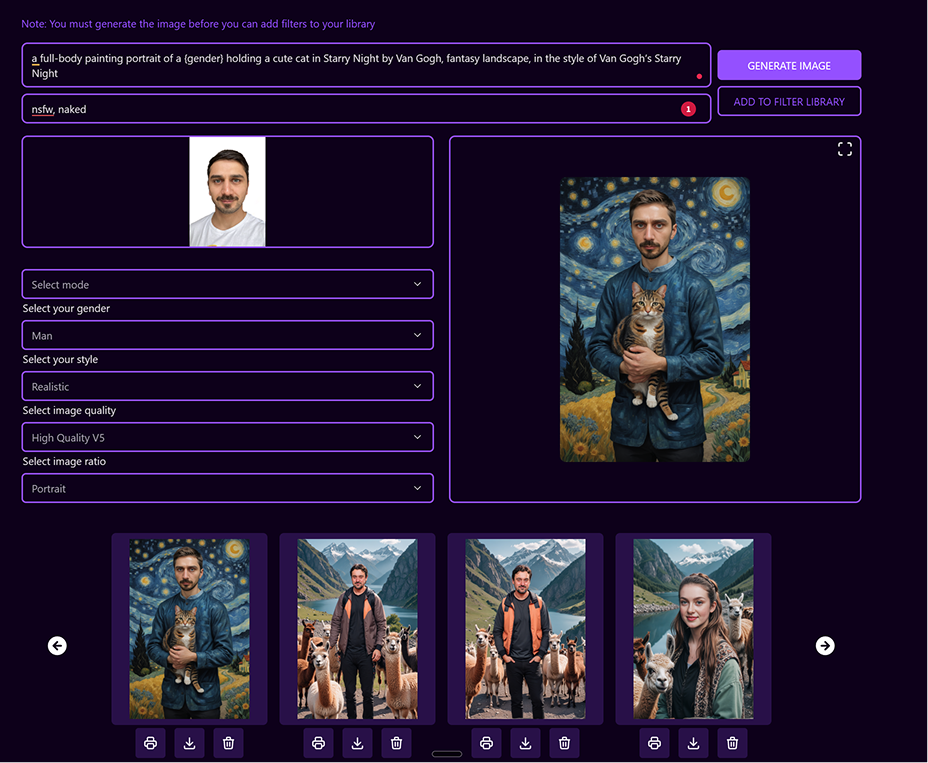
1. Write a Positive Prompt
Describe what you want the AI to generate.
A detailed and well-structured prompt creates significantly better results.
Example:
- Instead of:
“a portrait of a male in the style of Van Gogh” - Try:
“a full-body painting portrait of a {gender} holding a cute cat in Starry Night by Van Gogh, fantasy landscape, in the style of Van Gogh’s Starry Night.”
💡 Tip:
Always use {gender} instead of writing male or female manually.
This allows the filter to adapt automatically to:
- Male
- Female
- Boy
- Girl
⚠️ If you do not use {gender}, your filter will not work correctly in your event, because the system cannot match the guest’s selected gender.
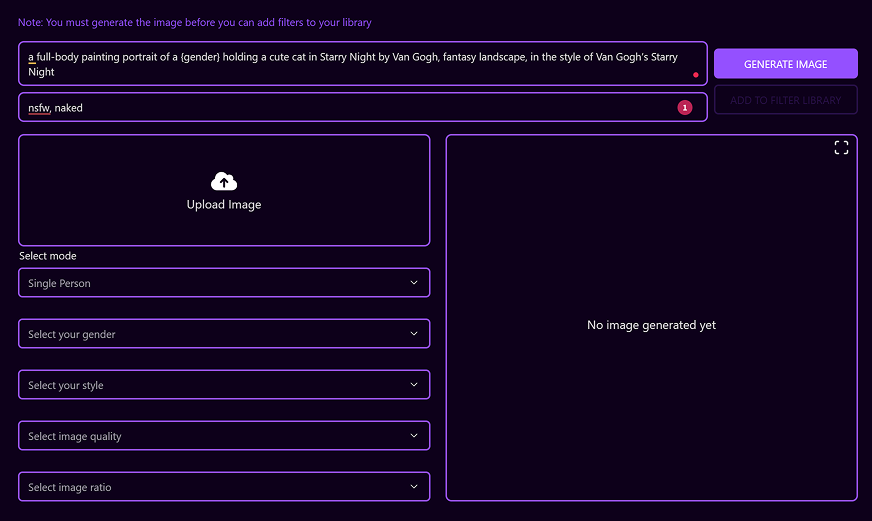
2. Add a Negative Prompt
Define what you do not want in the image.
For safety and event-appropriate output, always include:
- nsfw, naked
This ensures filters remain suitable for public environments.
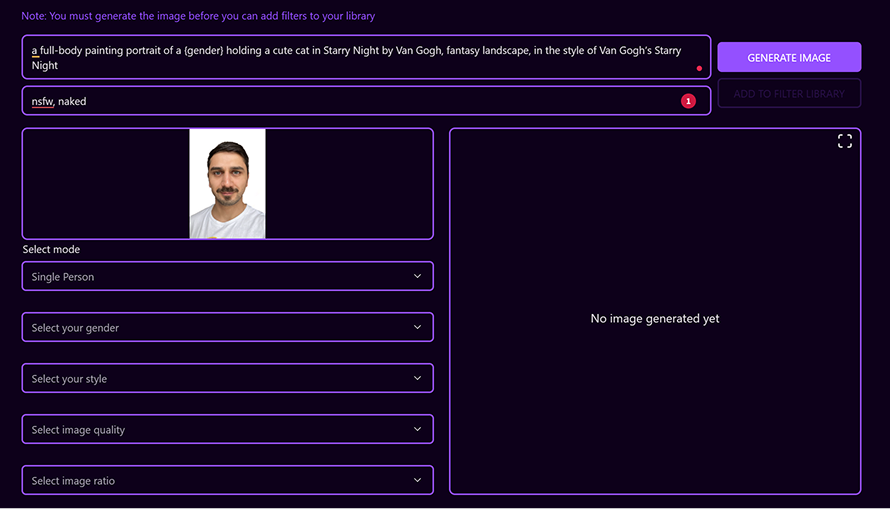
3. Upload a Test Image
Upload a reference image to preview the filter results.
Testing with multiple images helps ensure:
- Gender consistency
- Ethnic diversity accuracy
- Overall stability of your filter
4. Define Your Settings
After entering your prompts and uploading a test image, configure the following:
-
Gender
-
Male, Female, Boy, Girl
- Select the gender of the uploaded test subject.
-
Style
-
Realistic
- Animated
- Claymation
➡️ Learn more about styles in our style guide. -
Image Quality
-
Choose your preferred quality
- Recommended: High Quality V5
-
Image Ratio
-
Portrait (2:3)
- Landscape (3:2)
- Square (1:1)

5. Generate Your Image
Click Generate Image to preview the filter output.
Your AI image will appear within 10–15 seconds.
You can then:
- 🖨️ Print the result
- ⬇️ Download the result
- 🗑️ Delete and retry as needed
Fine-tune your prompt or settings until you achieve the perfect result.
6. Save to Your Filter Library
When you're satisfied, click Add to Filter Library.
You can now:
- Name your filter
- Upload a preview image
- Add a short description
⚠️ Important:
Do not change your prompt inside the save form.
The system automatically adds logic for gender handling.
Make sure {gender} was included in your original prompt before saving.

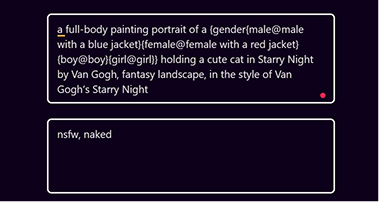
7. Customize for Gender Variations (Optional)
You can adjust specific details for each gender using the advanced gender logic format:
Example:
{gender{male@male with a blue jacket}{female@female with a red jacket}{boy@boy}{girl@girl}}
This automatically adapts the filter to the selected gender:
- Males → blue jacket
- Females → red jacket
Rules:
- Only edit the text after each “@” symbol.
- Changing the structure before “@” can break the filter logic.
View Your Filter
After saving, your filter will appear in your Private Filter Library.
You can now:
- Select it in the Event Creator for upcoming events
- Edit it anytime by clicking the pencil icon on the right
