WebApp Help Center > Getting Started
How can I create my own events?
How Can I Create My Own Events?
From the home screen, click “Event Creator.”
Here, you can manage existing events or create new ones for your clients.
To begin, click “Create Event.”
Follow the steps below to set up your event:
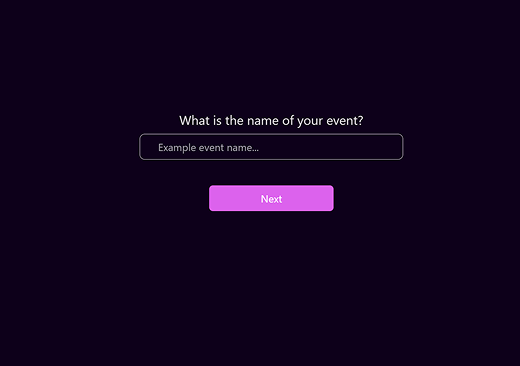
1. Event Name
- Enter a clear and unique event name.
-
This helps you identify it later in your gallery and event reports.
Examples: -
Summer Gala 2025
- Corporate Booth Berlin
Page 2 – Event Logo (Pro Feature)
- Upload an event logo to display throughout the photo booth loop.
- Great for branded corporate events or client activations.
💡 Note:
This feature is available only for Pro subscribers.
To upgrade your plan, click “Buy Subscription.”
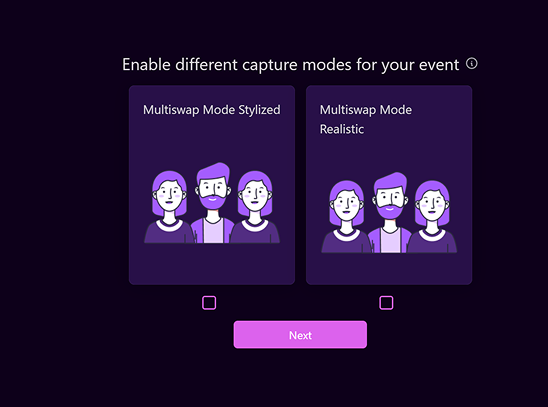
Page 3 – Capture Modes
Select how participants will interact with your photo booth:
-
MultiSwap Realistic
-
Produces lifelike group portraits while preserving facial features.
-
MultiSwap Stylized
-
Creates creative, artistic group images.
⚙️ FaceSwap mode is enabled automatically — no manual selection needed.
➡️ Capture Mode Guide
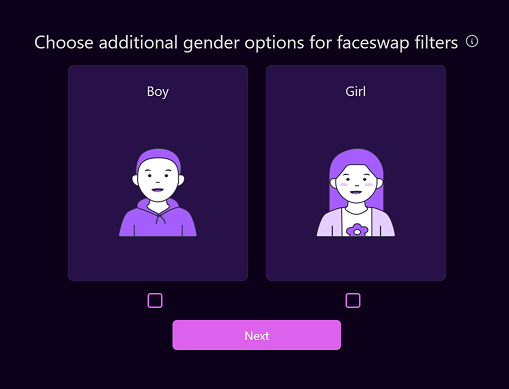
Page 4 – Additional Gender Selection
- Enable additional gender options (e.g., Boy, Girl) for events with younger participants.
- These options will appear later in the user flow.
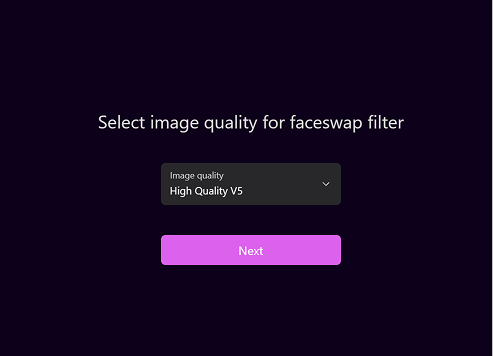
Page 5 – Image Quality Selection
Choose the quality mode for FaceSwap filters:
- Recommended: HD (v5) → best balance between quality and speed.
📸 Note:
Image quality for MultiSwap Realistic/Stylized is fixed automatically.
Learn more under “How to Set the Ratio?”
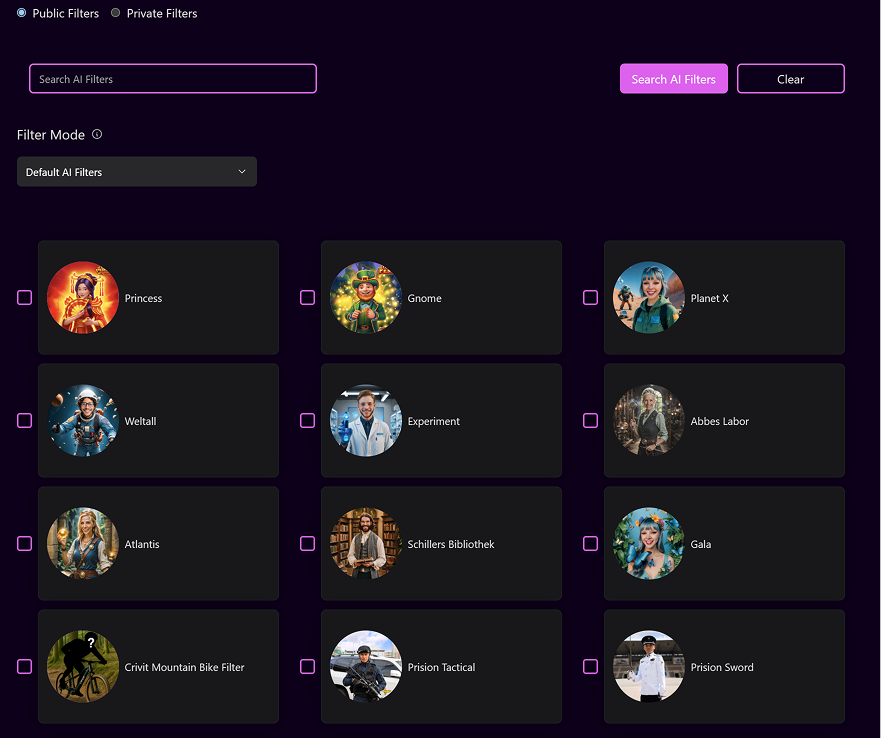
Page 6 – Filter Selection
This page lets you choose which AI filters are available during the event:
- Combine EventStation template filters with your own custom filters.
- By default, all FaceSwap filters are displayed.
-
Use the Filter Mode dropdown to switch between:
-
MultiSwap Realistic
- MultiSwap Stylized
-
Toggle between:
-
Public Filters – provided by EventStation
- Private Filters – created by you
- Use the search bar to find filters by keyword or theme.
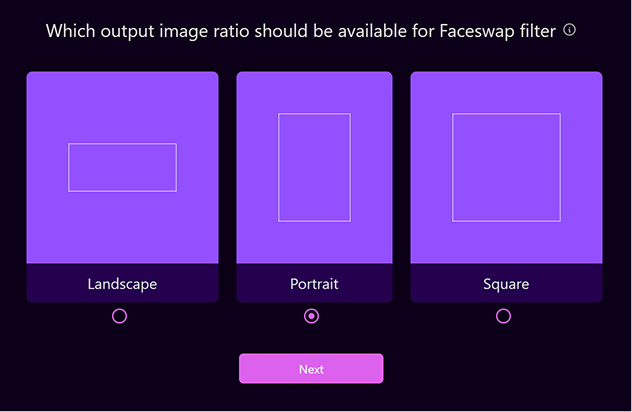
Page 7 – Aspect Ratio
Select the aspect ratio for FaceSwap filters:
Available Options:
- Portrait (2:3) – vertical booths
- Landscape (3:2) – horizontal setups
- Square (1:1) – ideal for social media
⚙️ Note:
The ratio for MultiSwap filters is defined by your camera setup
(during the Photo Booth Loop).
➡️ Camera Setup Guide
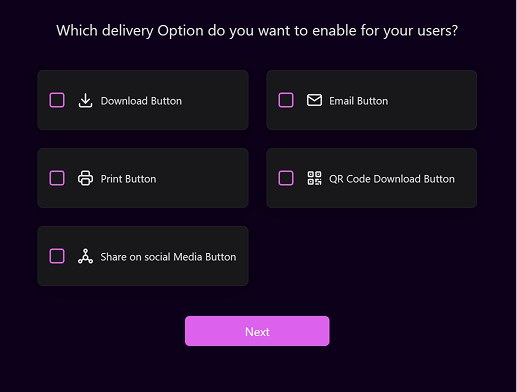
Page 8 – Delivery Options
Choose how participants can receive and share their images:
- Download
- QR Code
- Print (see Printing Guide)
- Social Media
🖨 Tip:
To configure printing correctly, review the Printing Setup Guide.
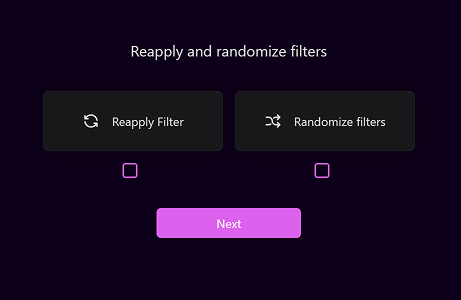
Page 9 – Additional Settings
Enable optional features on the result screen:
- Re-Apply Filter – reprocess the same image with the selected filter
- Randomize Filter – apply a random filter from your event’s filter list
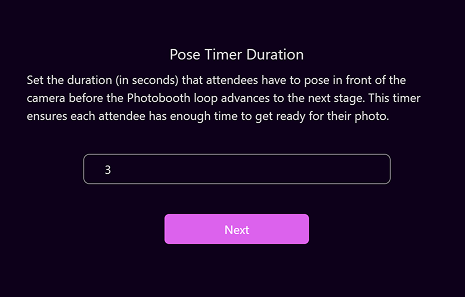
Page 10 – Pose Timer Duration
- Define the countdown duration before the photo is taken.
- Starts when participants click “Take a Picture.”
- Recommended: 3 seconds for smooth user experience.
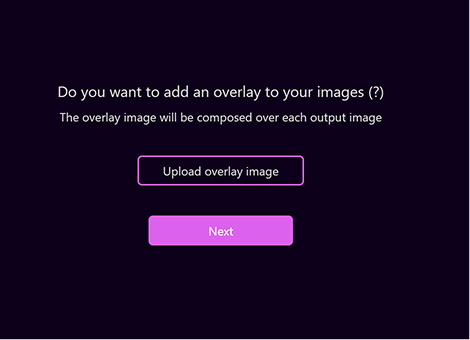
Page 11 – Overlay Upload
Upload a custom overlay to add branding, frames, or decorative elements.
Requirements:
- Same aspect ratio as your event setup (FaceSwap or MultiSwap)
- Transparent PNG (to allow the photo to show underneath)
⚠️ Incorrect sizing or missing transparency may distort the final output.
Page 12 – Preview Image
- Upload a preview image to help identify the event in the Start the Experience section.
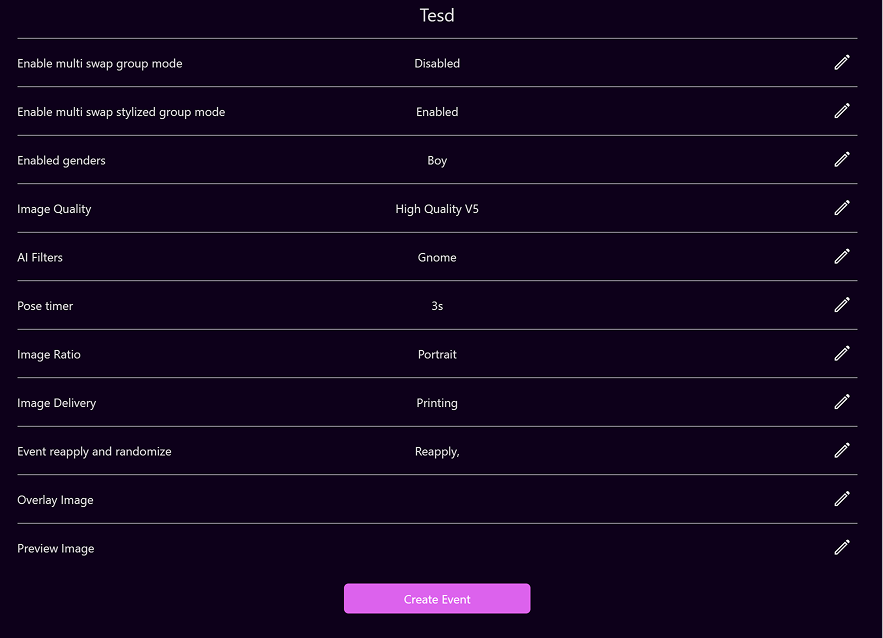
Page 13 – Overview & Finalization
- Review all selected settings on the final overview screen.
- To edit any section, click the ✎ Edit Icon next to it.
- Once everything looks correct, click “Create Event.”
Your event is now ready! 🎉
You can find it under Active Events and launch it anytime via Start the Experience.