How to Create Filter
The Create Filter page is where you create, test, refine, and finalize filters before publishing them.
This page provides an overview about:
- Choose the correct model
- Creating & Testing via Text or Image
- Finalize the Filter
- QA — Test Before Going Live
1. Choose the correct model
Inside the Filter Creator you can work with all our available models.
| Model | Supported Persons | Available Transformation logics | Limitations |
|---|---|---|---|
| FaceSwap v5 | 1 Person | Text Filter Inpainting |
IP-related assets can be enabled via inpainting mode |
| FaceSwap v6 | 1 Person Soon: Multi-Person (for up to 4 persons) |
Text, Inpainting (Img2Filter), Soon: Generative (Text + Assets) |
IP-related assets can be enabled via inpainting mode |
| MultiSwap (Stylized & Realistic) | 1–5 Persons | Text only | IP-related assets cannot be used (e.g. integration of a character, a object or similar) |
Understanding the Transformation Logics
To fully leverage the Filter Creator, it is essential to understand the three filter logic types.
When to Use Image2Filter vs Text2Filter
Both methods create FaceSwap filters, but they serve different purposes.
Summary
- Image2Filter → best for controlled and consistent campaign visuals
- Text2Filter → best for creative scene generation that look different each generation
| Use Case | Recommended Method |
|---|---|
| You want full control over the scene | Image2Filter |
| The scene must match a client campaign visual | Image2Filter |
| You want predictable and consistent outputs | Image2Filter |
| You want to generate scenes freely with prompts | Text2Filter |
| You want maximum creative flexibility | Text2Filter |
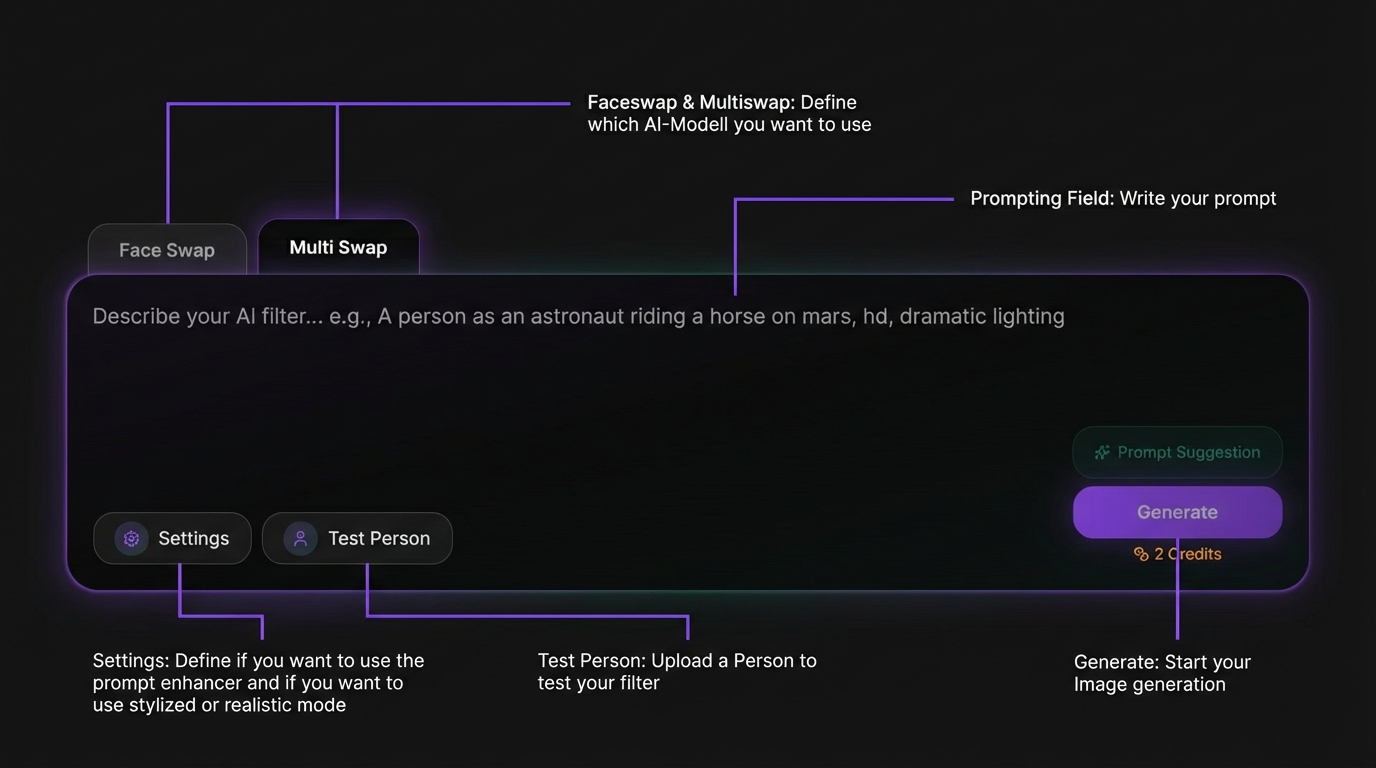
2a. Creating & Testing via Text only (Text 2 Filter)
Creating with our Faceswap Models are possible in two ways:
A. Text 2 Filter (via Prompting) - (supports both Faceswap or Multiswap)
Write your prompt describing the final output.
- Wire a prompt or use the Prompt Suggestion to auto-generate and refine your prompt.
- Upload a test person to preview results
- Adjust settings (aspect ratio, prompt settings, etc.)
- Generate and iterate until satisfied
Learn how Text2Filter works: Faceswap: Text2Filter
Learn how multiswap Text2Filter works: Multiswap: Text2Filter
 |
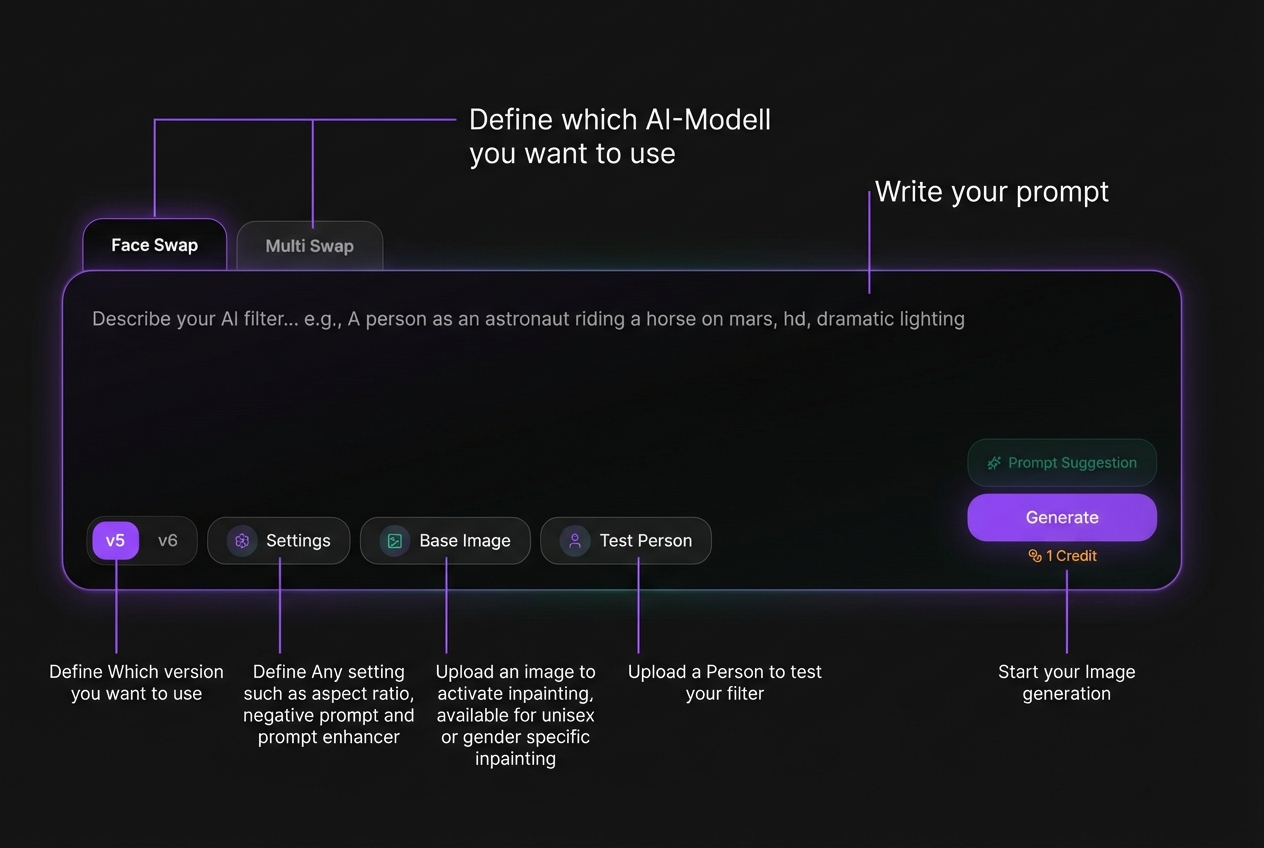 |
B. Using Base Images (Image2Filter) - supports only Faceswap
To start the mode, upload a base image. This is only available for our Faceswap models
- The aspect ratio is automatically taken from the image
- You can define gender variants (Unisex, Male/Female, etc.)
- Upload base images for each selected category
Learn how Img2Filter works: Faceswap: IMG2Filter

3. Review Generated Results
After generating, you can:
- View the exact prompt used
- Copy the image to the Conceptualizer for variations
- Download the image
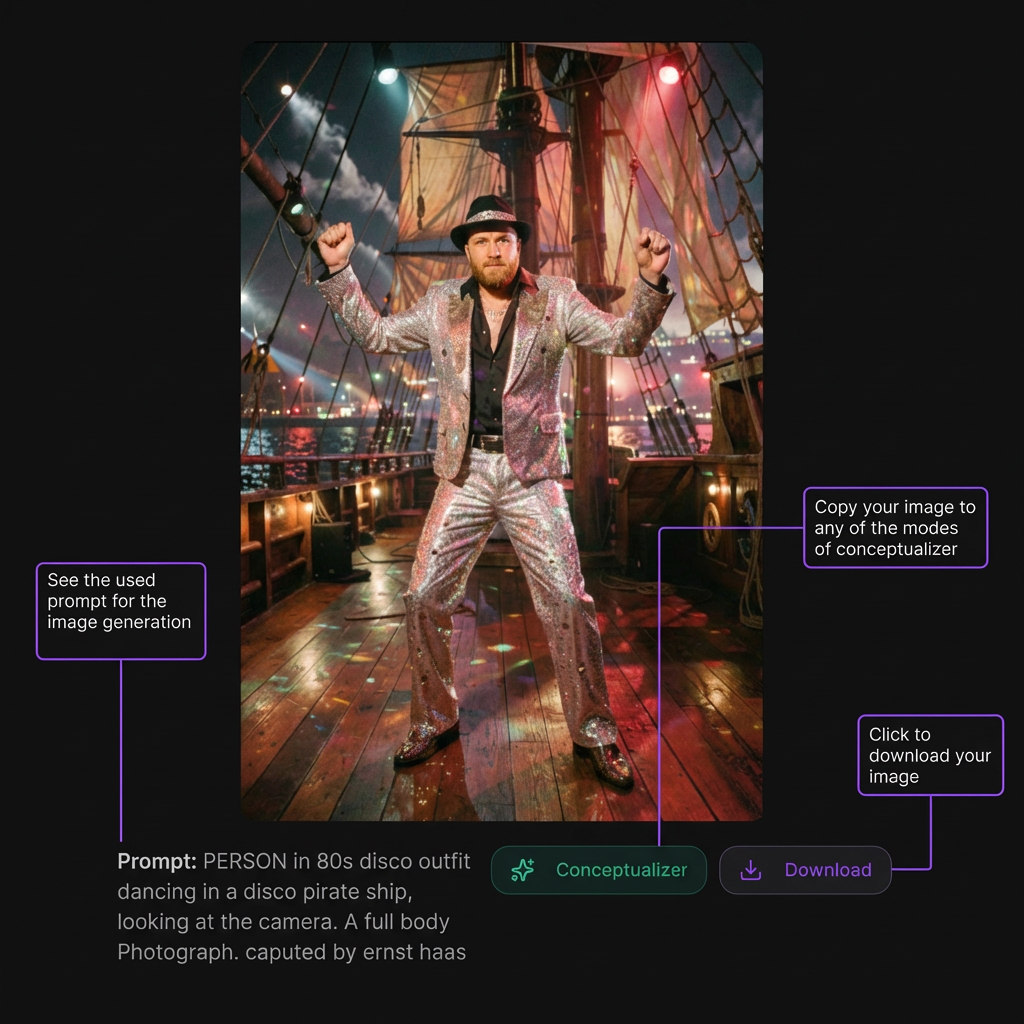
Once you’re satisfied, proceed to finalize the filter.
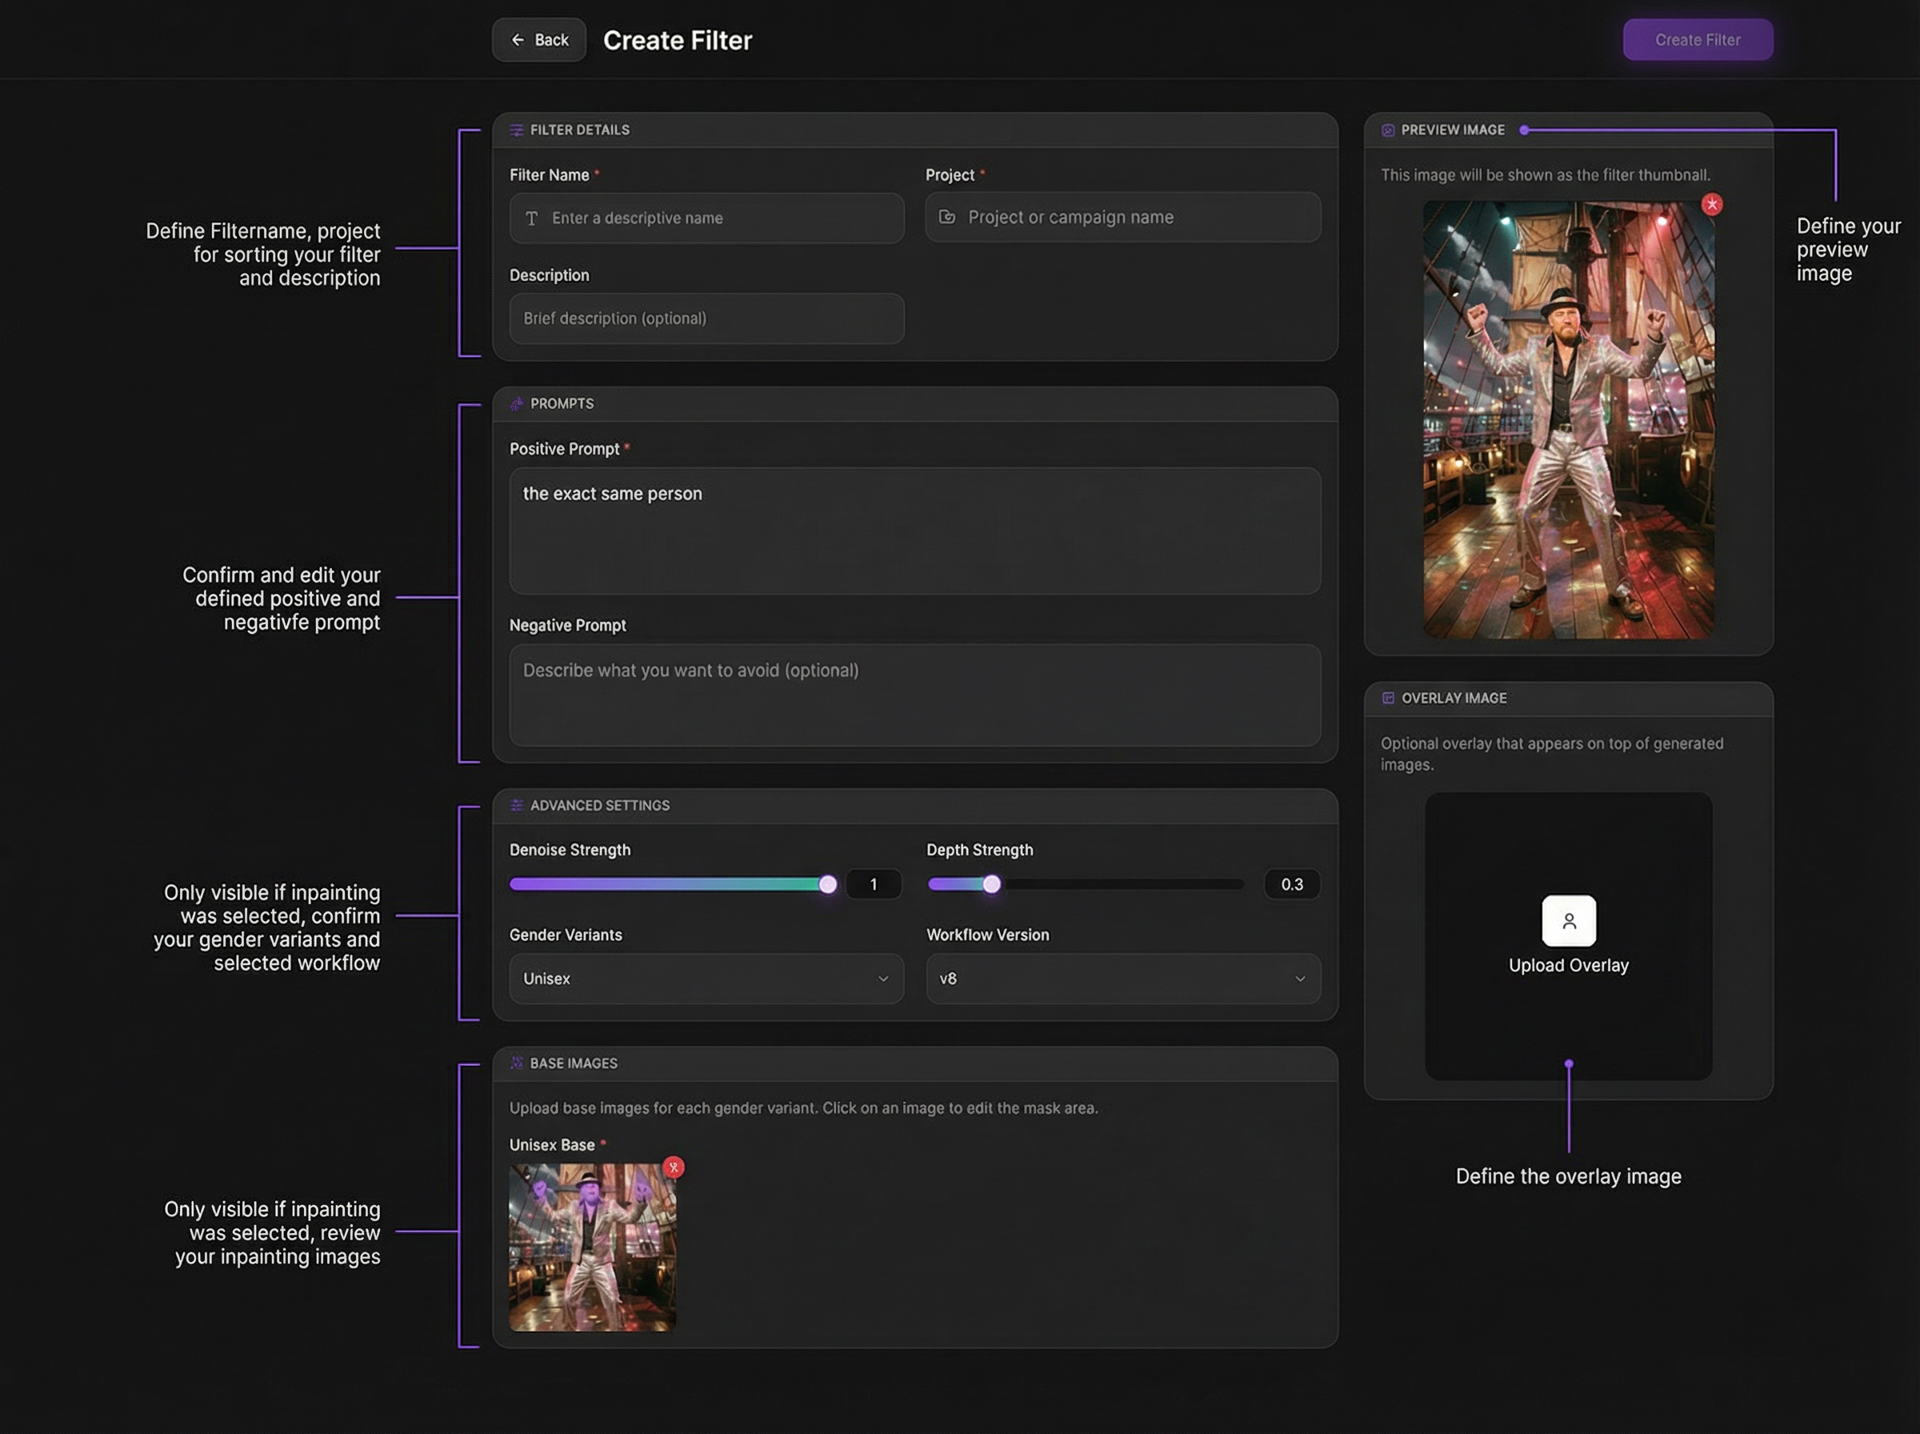
4. Finalize the Filterinformation
When confirming a filter, you can:
- Set filter name and project
- Confirm/edit prompts
- Adjust advanced settings (if used)
- Define preview image (filter thumbnail)
- Upload optional overlay image
Preview image and filter name will appear in the photo booth and via API. Click Create Filter to save.
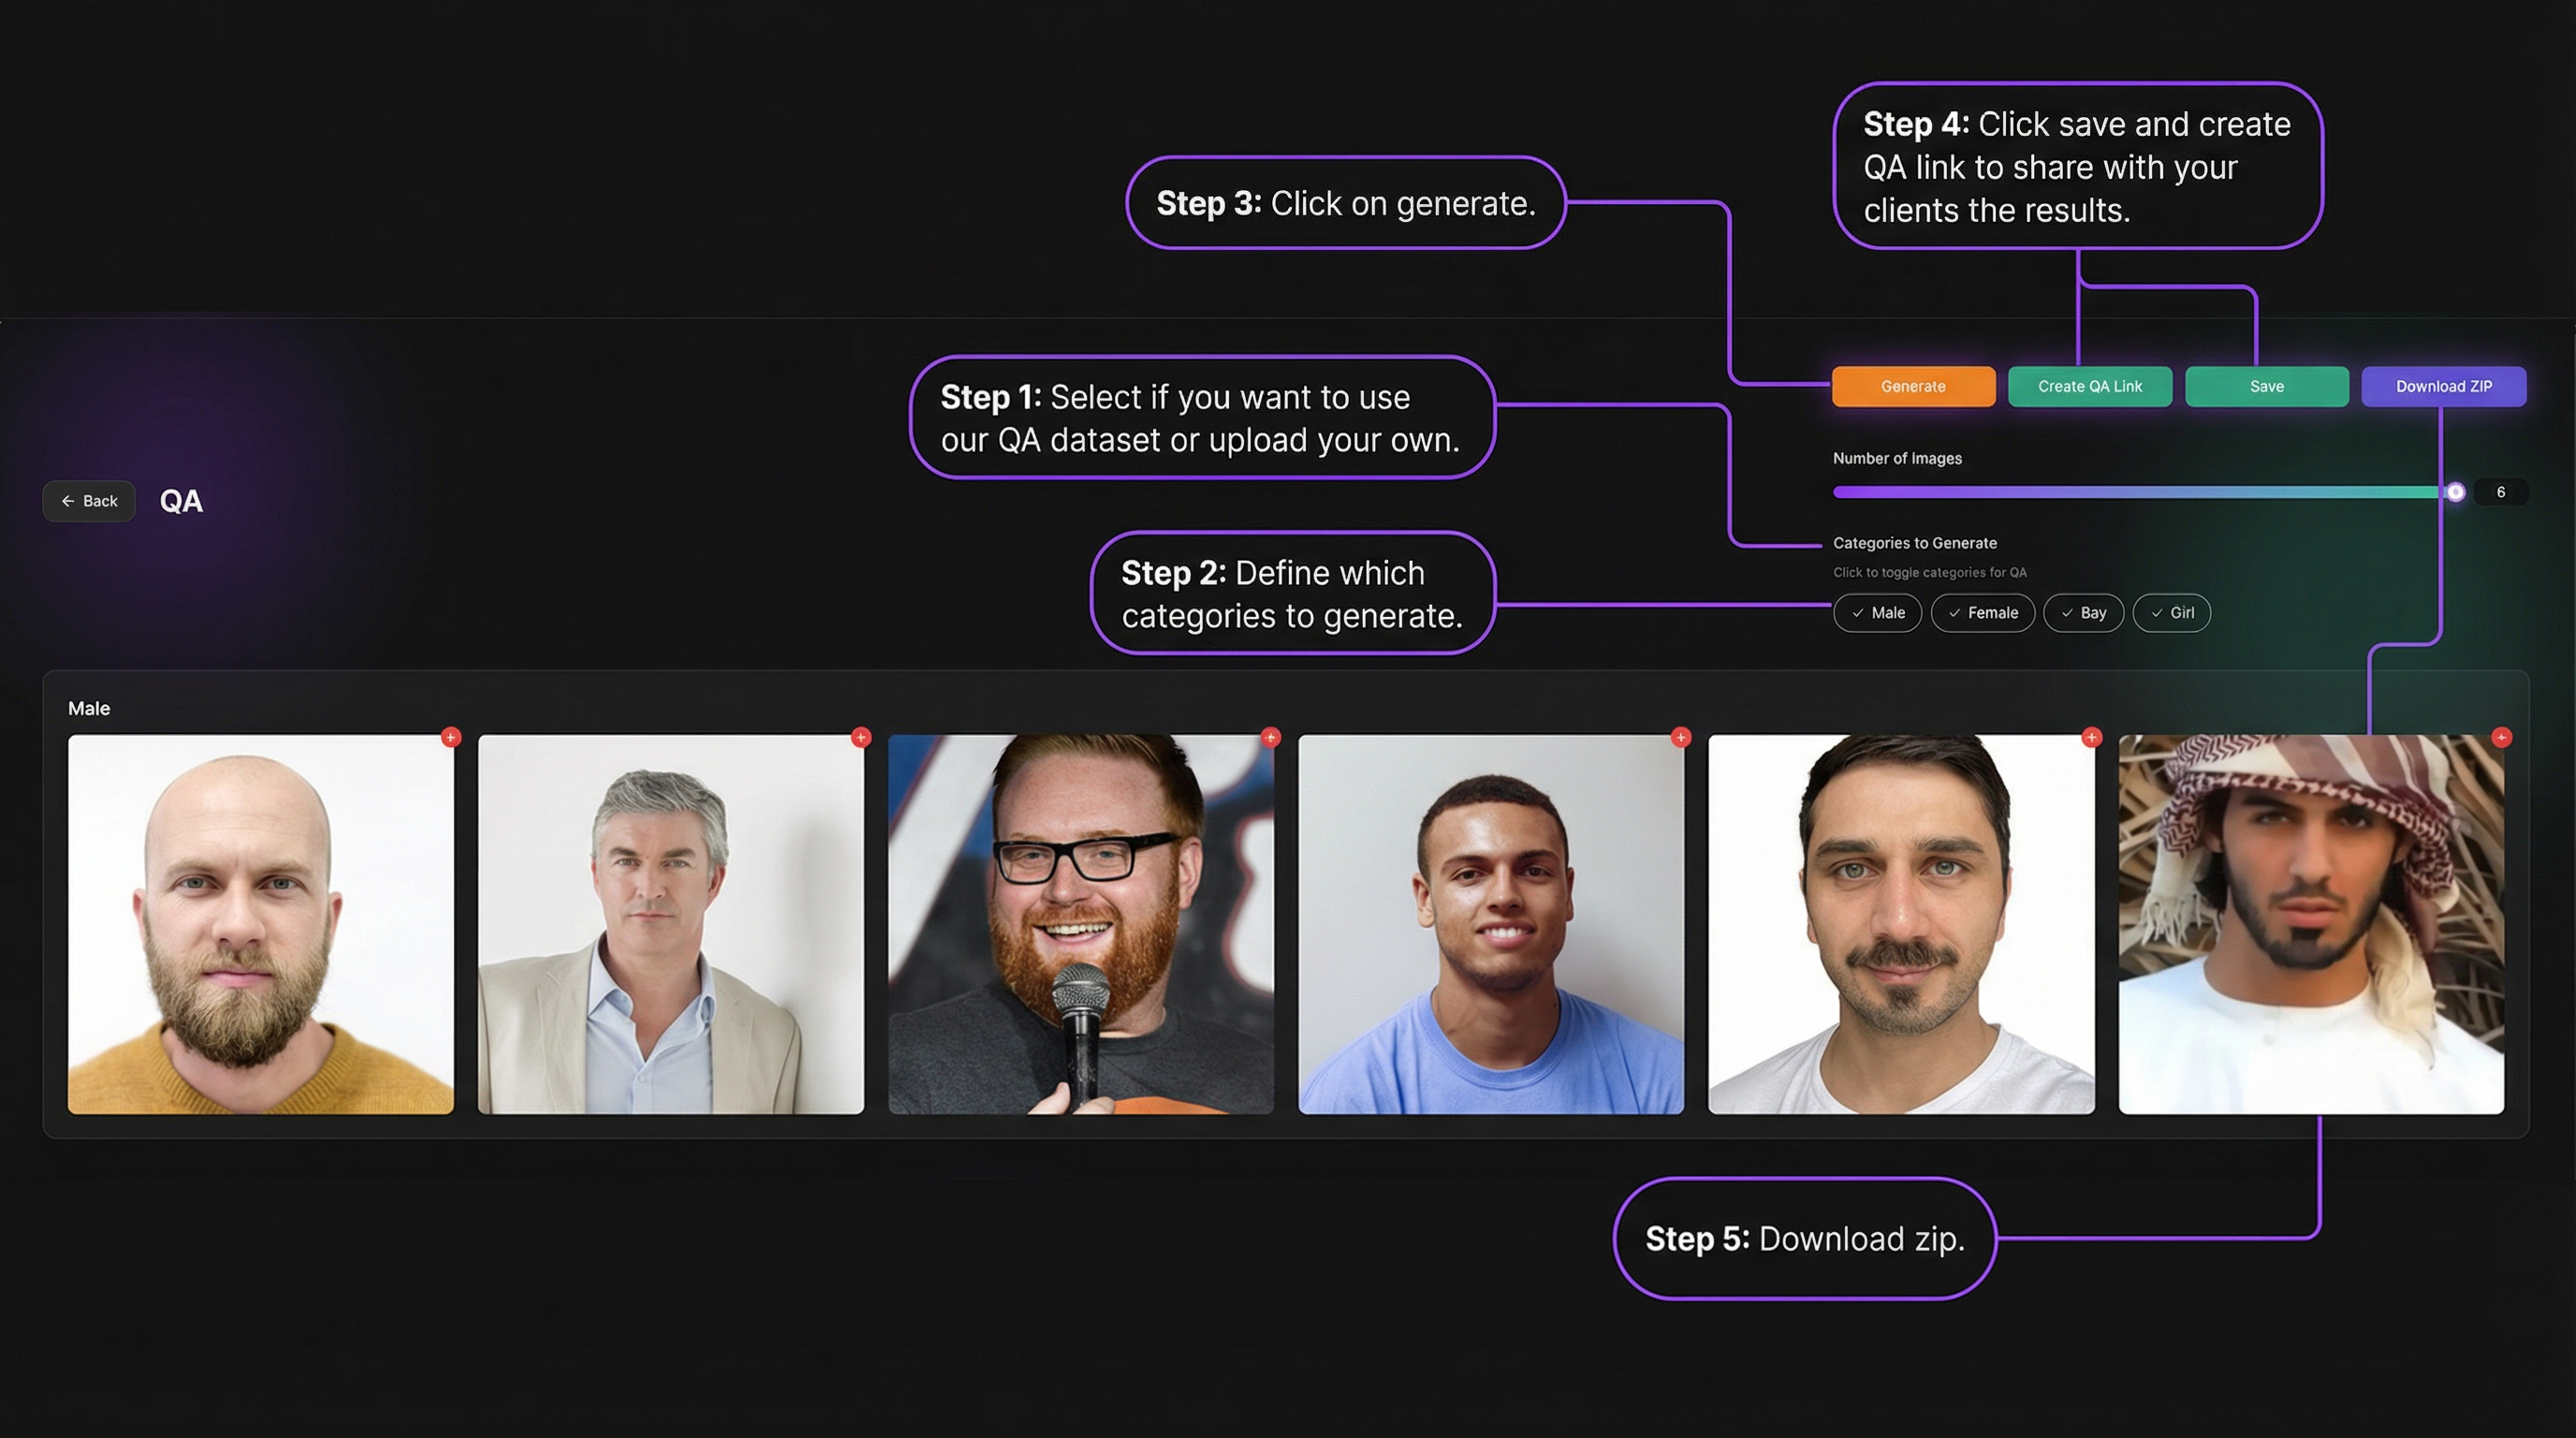
5. QA — Test Before Going Live
After saving, run QA to validate your filter.
You can:
- Use preset test datasets or upload your own
- Select categories to generate
- Generate results
- Save results or create a shareable QA link
- Download all outputs as ZIP
QA helps ensure consistent results across faces and scenarios before deployment.
Learn how to setup a good QA dataset: How to create a good QA Dataset?